
 When we first started with strawberries, we purchased two varieties.. One of them was a day-neutral type that is grown by commercial farms as an annual. We had visited a local strawberry farm and fell in love with the taste, but we had no clue the work required to maintain this variety. Most growing them here in the south replace them yearly or mow them down at the end of the season so they regenerate for the next. Needless to say, with full-time careers and kids in all sorts of afterschool activities, this high-maintenance variety didn’t work for us. In fact, I don’t remember picking one berry the entire time we babied those plants. We did not have the time or experience to care for them. The other variety we purchased was Carolina Pineberry, a white strawberry. They were advertised to taste like pineapple. We wanted this one because when we started upon this venture, we knew we wanted unique fruits. Well, today, these plants are literally crawling everywhere. They are growing along the edges of raised beds. They’re tucked into pots with fig trees, perennial flowers and even cabbages. When I say they are everywhere, believe me. I don’t know that they taste like pineapples, but they do have a sweet, tart mellow taste. But, be warned. They are disappointingly small. I can’t even say that they need more time to mature, because I’m fairly certain these plants have been growing in our garden for at least four years. That’s more than enough time to get established.  After getting some attention to other parts of the garden and flock, we decided to revisit the berries. So this year, we purchased 4 different types of strawberries. All of them are everbearing. This means they produce from early spring through frost. Surprisingly, South Carolina received its first snow in about six years this winter. Strawberry plants were already in bloom, and some still kept their flowers even as the snow melted. They are eager growers. To add strawberries to your home garden, you can purchase dormant roots or started plants. Some people have claimed to grow them from seed, but it has never worked for us. Besides, can you imagine how long it would take to wait until those tiny plants emerged and actually grew large enough to provide you with food? It’s just not worth it to me. So, if you have the money, buy the plants. If you want to save- and I’m all about cheap or free- purchase the roots. You’ll get more for your money. In most cases, the amount you would pay for one plant, you could get 10 roots. And with these gas prices, that sounds like a good deal to me! So let's get those strawberry roots planted!  We mail-ordered several plants from a reputable online nursery. Sure, you can go to your local big box store and purchase roots, but in my experience, they are very dry and the success rate is low. You really don’t know when the roots were packaged, how long they’ve been on the shelf, and if you think these roots look dead, I’ve seen worse. Find a nursery you trust that ships healthy plants. If you’re interested in where we got ours, send an email. We’re working people, so when our plants arrived, they were stored in the cold garage for a few days. You can even place them in the refrigerator. When you are ready to plant, remove the plants from the packaging and separate them.  Prepare a planting hole about 6-8 inches deep and 4 or more inches wide to allow enough space to spread the roots so they have lots of room to grow.  Be mindful of where the roots and crown separate. The crown should nestle just above the soil. The roots should be beneath. The roots will dry out if they are not buried properly. The crown will rot if it is buried too deeply. Once the roots are planted, water them in very well and walk away. The roots will get established. Once the weather begins to warm up, the plants will wake up. Once a few leaves form, the plant will want to begin developing flowers. Snap these flowers off to allow healthier roots to develop.  These strawberries were planted on January 29. Here they are just one day shy of a month later, February 28. Some looked as if they were dead for nearly two weeks before showing signs of life.
0 Comments
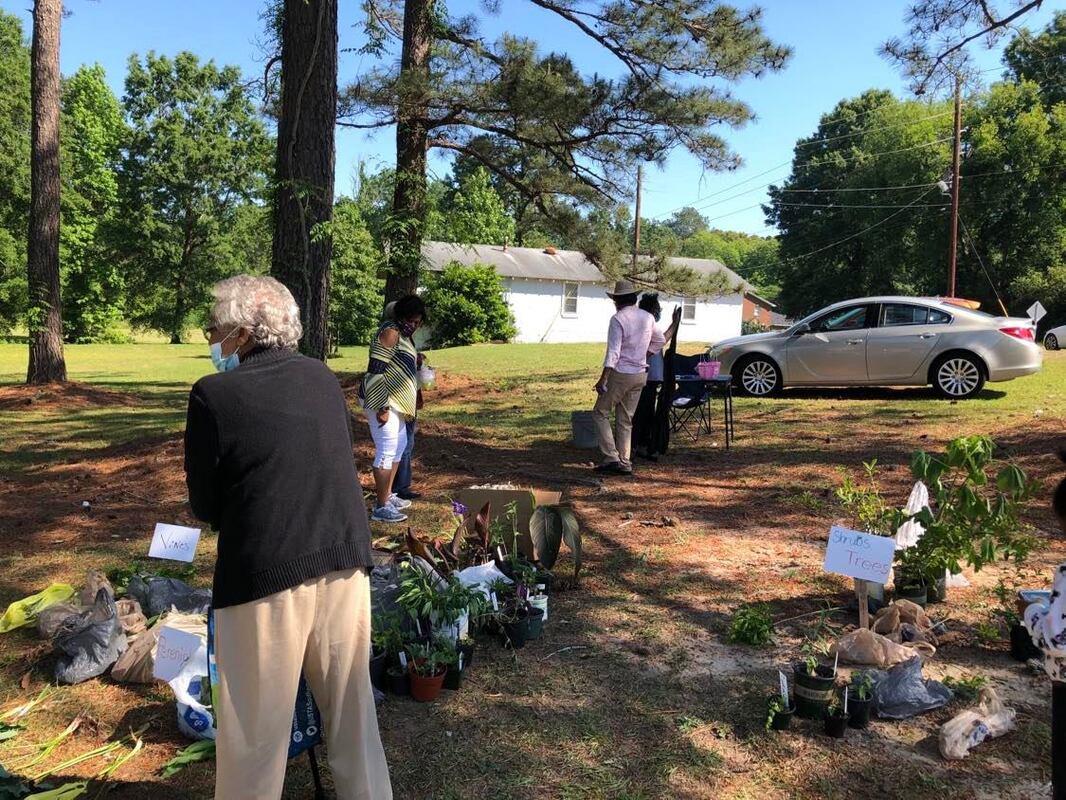 When we finally moved into our house several years ago, our primary emotion was relief. After several months of waiting, we could finally settle and get back to living in our own space. It wasn’t until we walked out the front door for the first time that we realized the real work had just begun. We had a home surrounded by white builder’s sand, good old South Carolina clay, and a few splotches of crab grass here and there. Beyond that - an unfathomable number of pine trees with a few hard woods sparsely mixed in. There was no landscaping included in our contract. We had no idea what we would do to fix this barren mess.  A few weeks later, my aunt introduced us to a local plant exchange. We had no idea what we were getting into. Not wanting to go empty handed, we dug up some crowded red canna lilies from my parents’ yard and headed to the swap. After eyeing some shrubs and common perennials, we took our places amongst skilled and eager gardeners lined up across a parking lot on a crisp spring morning. The lead organizer used a bullhorn to quiet the crowd. A delighted gardener accepted a potted plant from the raffle. Shortly after, the rules were laid out for newcomers, and the crowd waited in anticipation. The sharp trill of the whistle served as an invitation for the participants to break free of their ready stances to collect their wares. This experience- the excitement of mingling amongst gardeners of all ages, sharing knowledge about how plants grow and what they need- was the most exhilarating introduction of my family into the world of gardening. We gathered so much that day in plants, dirt and gardening wisdom that we didn’t miss that community plant swap for several years. It became a family tradition. We soon spent part of the winter holidays, searching for other opportunities to share and grow our garden through plant swaps and exchanges all over the city. Here are a few of our favorites around the South Carolina Midlands. Each one is organized quite differently, so I encourage you to visit their websites to learn more.  There are other plant exchanges sponsored by organizations throughout the year. Check the public library system in your area for possible gardening events. Native Plant Societies and Master Gardener Associations are also great sources. We picked up spiderwort (tradescantia) at a local beekeeper’s meeting several years ago. So, you may sometimes score free plants in odd or unexpected places. Maybe you could even organize one for your own neighborhood or community. You don’t have time for these structured events? It’s okay. There are several Facebook groups that offer members more impromptu opportunities to swap by mail or porch-pick-up for safe, contact-less trades. In South Carolina, Plant Swap Columbia has come about with members offering pop-up swaps and plant meets all over town. You can find one nearly every weekend during the warmer months. Another popular group is Upstate SC Plant Swap. Gardeners are some of the most generous people on the planet. So, if you are itching to add something new to your space, you don’t necessarily need to go out to the nearest big box store to spend money. Dig up extra bulbs, flowers, grasses, or even shrubs that are screaming to be divided. Place them in clearly labeled bags or pot them up, and head on out to a local plant exchange to share your beauties with others. Nothing beats the excitement of planting vegetables and fruits for your family to enjoy. Preparing gardening sites or raised beds is one of the most loved moments of spring cleaning on the homestead or in the backyard garden. But…it is time-consuming! What if you only had to do it once? Growing perennial fruits and vegetables can cut back on the amount of time you spend planning and preparing your garden, rebuilding soil, starting seeds and babying tender seedlings all winter long. You may need to cut back some old, dead foliage and maybe add a little compost or mulch, but that is about it. By taking the time to learn more about the perennial vegetables, herbs and fruits that grow well in your area, you can have your family eating from your yard all year long with very little effort. This may be a great way to ease into gardening if you are working full-time and simply don’t have the extra moments it takes to tend a full garden, but you want to make some changes here and there to get you started. . Perennials come back year after year, so you just need to put in some work early on to get them started. Here are a few vegetables my family grows that may give you a few ideas about where to begin as you plan your own perennial garden. Perennial Vegetables While most vegetables that fill our plates are grown as annuals, there are several perennials that will make an encore appearance if given the opportunity. These are a few that have permanent homes on our property.  Asparagus Asparagus can live 15 to 20 years once established. Although you can start them from seed, it is best to begin with two- or three-year-old crowns planted in hills six inches deep. It takes about three years for the plants to mature enough to harvest healthy spears. If you purchase crowns, it is best to let the spears come up and flower the first year to get the roots well-established. You should be able to harvest some healthy spears the following year. Asparagus can be harvested early spring through summer. When it gets too hot, let them go wild so they gather energy and nutrients needed to push up thicker stalks for you during the next growing season. Maintenance: Top the bed with some fresh compost early in the spring to keep them flourishing through the season. Cut the spears when they are 8-10 inches long. If they become much taller, it’s best to leave them and allow them to leaf out. They will continue to develop new spears. Kale Considered a biennial or soft perennial, kale produces greens for two years before setting seed. However, there are some varieties that are true perennials that can live for 5.to 6 years and are propagated by root cuttings. Start kale from seed by direct sowing into your garden, or start them indoors about a month before you want to set them out. In southern zone 8a, we planted them indoors in February for early spring planting and in July for fall and winter. Our fall garden continued to produce straight through winter and early spring. White flies and other pests can be a bother during the warmer months, but you can still get a good crop using preventative measures. Maintenance: Fertilize greens with 10-10-10, compost or organic matter that is high nitrogen such as aged chicken manure. Remove the outer leaves and any brown or dry leaves to encourage new foliage.  Walking Onions Egyptian Walking Onions are quite versatile with a scallion-like flavor. They are perfect for the backyard garden since they multiply so freely. Another name for this type of allium is multiplying onion; one bulb can grow up to 8 new onions! The walking onion can be harvested from both ends. In fall, it forms a bulb underground. In the spring, the early shoots can be harvested as scallions, and later, smaller bulblets are clustered at the top of the plant. The taste resembles shallots. If these topsets are not harvested, they grow larger and heavier. The top of the plant will eventually topple over and root, forming new plants. Hence the name- walking onion. Maintenance: If planted in an open area, just let them grow. However, if your goal is to contain the in a particular space, it would be wise to snip drying stalks in the fall and harvest the bulblets for your table or plant them in more desirable areas in your garden. 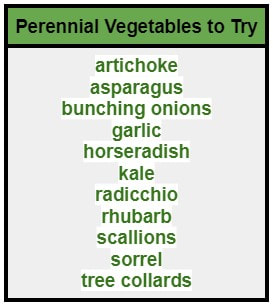 These are just a few of the perennial vegetables we grow. There are many others that may better suit your palate. Begin with one or two of your favorites and try a few new ones each year. Check back for the next post in this series, Perennial Herbs. It's fall ya'll! While many others may be thinking about leaves changing colors, a long-awaited break from the sweltering summer heat and switching over to a cozy, cute wardrobe, my mind is spinning with the one thing I know that has to be done before the cold sets in. Coop cleaning! Yeah. It’s a routine up here on the hobby farm. To prepare the flock for the winter, the coop needs to be thoroughly cleaned and dressed with fresh hay for the winter. So how do we do it?  First, let me just say that this has probably been the absolute laziest summer we’ve had so far. I usually clean the coop about every two or three weeks in summer just to keep mites and critters out. This year, I mostly relied upon the deep litter method to keep down odor. With our crazy, busy schedule, it’s been difficult to be consistent. So back to the first step, get rid of the cob webs!  Yeah. I am deathly afraid of spiders. And just as we attempt to make a cozy space for chickens to lay eggs where they are not in direct sunlight, and have a little privacy, we are essentially creating the perfect invitation for spiders. Huge ones. I see the Youtube videos and blogs with these pristine coops with gingham curtains and bright white walls. Our reality is not like that at all. At least not for busy families who are working full-time and shuttling kids from one activity to the next! We have cobwebs. Creepy ones! And before I can do anything, they gotta go. I keep a broom in the coop, but I wish I could use a vacuum. Chickens create an insane amount of dust Once the cobwebs are gone, we move the poop out. Once the overhead is clear, I use a large snow shovel and pitchfork to remove the old bedding. If you faithfully clean your coop at least twice a month, this would not take very long. However, when you’ve allowed the layers to build for several weeks or months, it can take an hour or so. It can easily turn into a two-day job for me. As chickens walk, they poop. While they sleep, they poop. They pretty much eat, peck and poop all day long. The great thing about all this poop is that after three months of rest, it will make great fertilizer for the garden!  Don’t trash the poop! Add this mixture of poop and straw into our compost pile. Chicken manure takes about three months to break down, so it is safe for the garden. It is very high in nitrogen. Applied directly to your plants without this rest period could cause root burn. Sometimes the smell of ammonia can linger in the walls and wood. To eliminate the odor, I spray everything down with apple cider vinegar. The roosts are removed, sprayed and scraped, if necessary. For a citrus scent, add lemon and orange peels to apple cider vinegar and leave it for a week or two. Once everything dries, we add a fresh layer of straw or hay, and you’re done!  I think they like it.
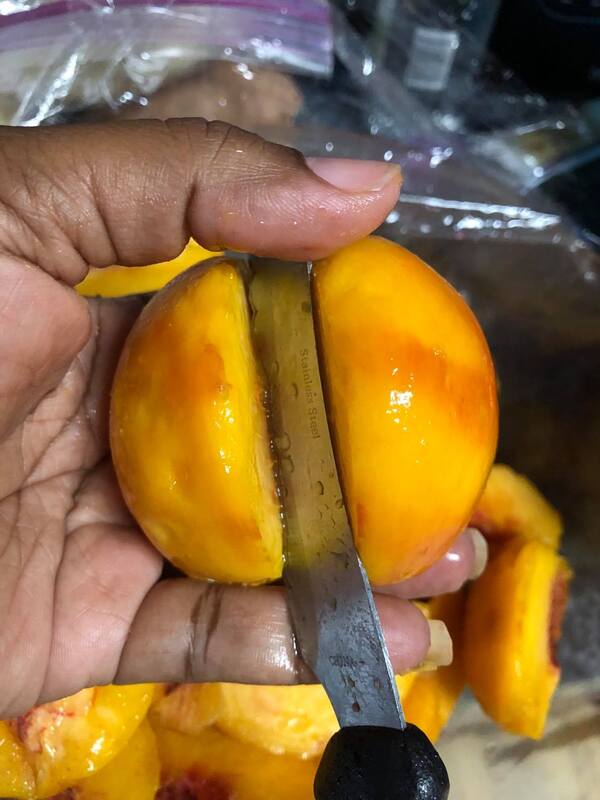
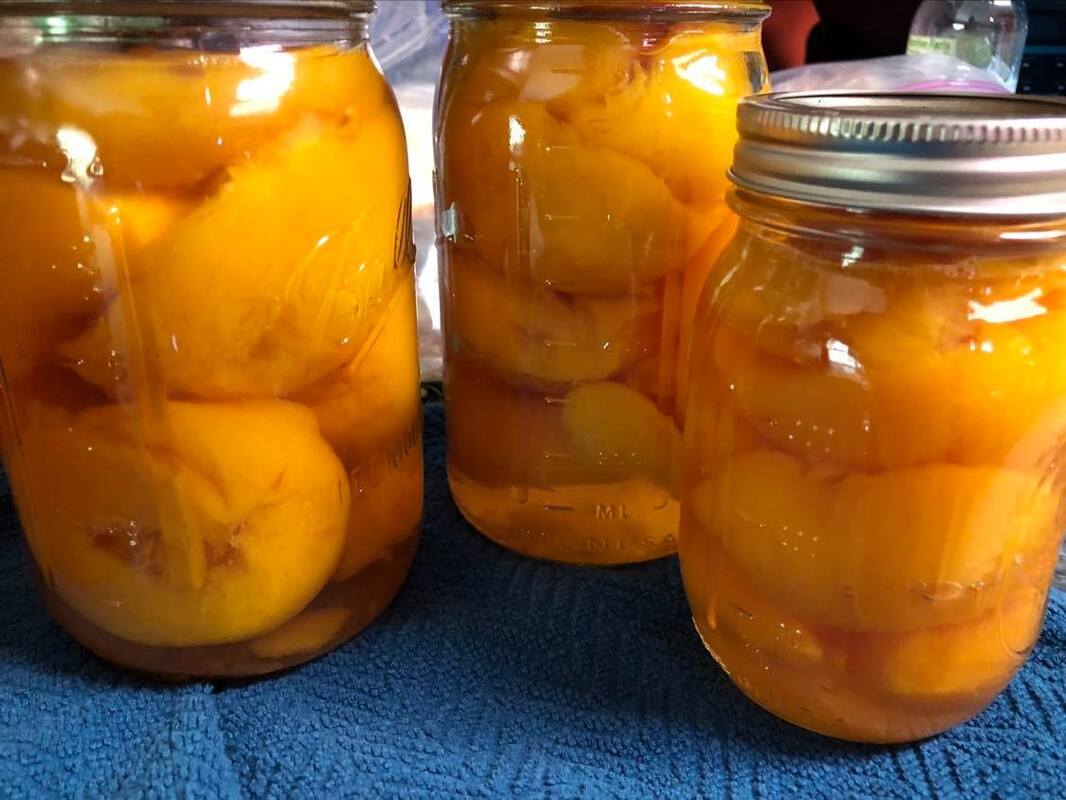 It was such an exhilarating feeling to neatly fold the dish towel and put it away with my canning gear after preserving peaches for the first time. This reminded me of racing around my grandma’s kitchen on a hot summer day while she sat at her old, green-topped metal table peeling a bowl of peaches or pears from her backyard. I never had the confidence to can peaches until this very week. Jams and jellies are no problem. There is something therapeutic about chopping fruit, mixing in sugar and spices and watching it all meld together into a tasty treat captured in a jar. But canning fruits and vegetables has always intimidated me. I thought I was bound to somehow mess up. Then I tried it. And- Oh. My. Goodness.- I think I’m hooked! Before the tweens became teens, we’d travel to fruit orchards throughout the summer to pick blueberries, peaches, apples, blackberries or strawberries. But now that it seems to be such a daunting experience for all except the six-year-old, we’ve settled on simpler means like driving down to the State Farmers Market on a Saturday morning to pick up a bushel of South Carolina peaches already boxed and ready to go. We eat a lot of them fresh, but a major purpose is to make peach jam. It is definitely the family’s favorite next to scuppernong jelly. After two days, I managed to whip up 10 half pints. A week out and we are already down one jar! Although I planned to make at least two more batches, there were still a huge amount of peaches left. So, I set out to try some different recipes.  Aside from making jam, we cut and freeze peaches for smoothies and of course, nothing says summer like a freshly baked peach cobbler with a side of vanilla ice cream. This year, the Mister decided to get in on the action by whipping up a delicious peach barbecue sauce to set off some ribs. As if that were not enough, he prepared a simple syrup, pureed a few peaches with the immersion blender and created a peach lemonade. Our final stop will be peach salsa. I love a sweet salsa on barbecue nachos. Why not peach? So back to canning those peaches... It’s quite simple and takes about two and half hours of your time. Of course you want to start by cleaning and sterilizing the jars. I use pints. Although there are five of us in the house, it is important for me to plan for the picky eaters who live here. One of them would lick the rim of the sugar canister if it were allowed, while another doesn’t have an appetite for sweets at all. So I prefer to store things in small quantities to limit waste. Allow the jars to sit in boiling water while you prepare the fruit. What I normally do is bring the water to a boil, just before it gets to that point I set the clean jars in the water. The stove is turned off until I’m ready to begin filling them. Be sure you time this right. You never put hot food or liquid into cold jars, and you do not want to put cooled jars into hot water. The results could range from a cracked jar to an exploding one. I’ve experienced both. It leads to a long night. Prepare a stock pot and fill it with water. Bring it to a boil. You will use this to blanch the peaches for about 30 seconds, long enough to loosen the skin. Close by, you will need a large bowl of ice water. Using a slotted spoon remove the peaches from the boiling water and place them in the bowl to cool down and stop the cooking process. Once you are able to handle the peaches without burning yourself, lightly score the bottom so you can peel the skins away. Cut the peeled fruit in half and remove the pit. Work quickly to prepare the peaches before they begin to brown. You could sprinkle Fruit Fresh to slow down the browning, but it’s not a requirement.
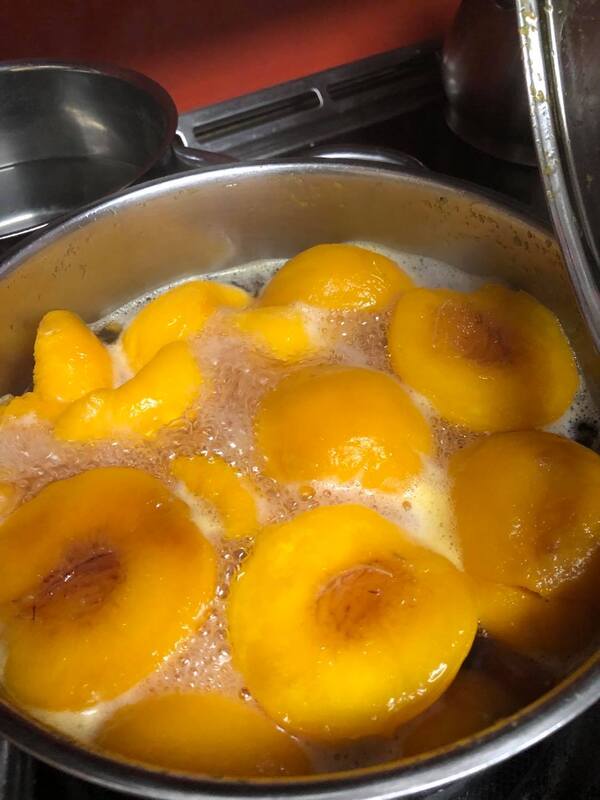
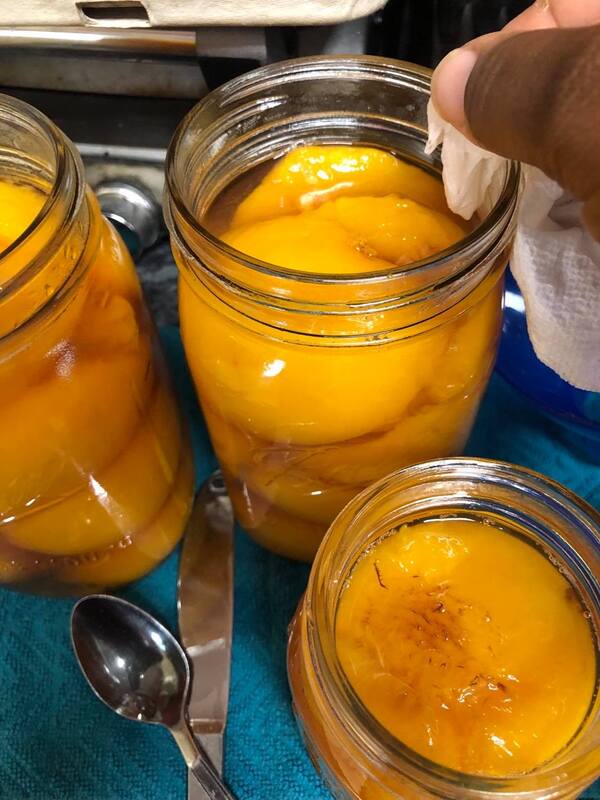
While you are preparing the peaches, it would be helpful to begin making the syrup. Use the chart to determine how thick you would like your liquid. I personally don’t care for an extremely sweet syrup. It’s just too much. For this recipe, I settled for light syrup. My kids claimed the peaches were better than store-bought, so they must have approved. Fill a second stock pot with the desired amount of water and sugar. Bring the mixture to a boil, stirring occasionally and being careful not to burn the sugar. You will know the syrup is almost ready when the sugar is fully dissolved. This will take 10-15 minutes. Add halved or sliced peaches, put the lid on and bring the liquid back up to temperature. Simmer for 5 minutes, Remove each jar from the hot water. I usually turn it right side up on a dish towel or mat. Fill the jars with the hot peaches and liquid, leaving a ½ inch head space. This is the distance from the rim to the top of the contents of the jar. Be sure to pack as many peaches into the jar as you can and fill it with the prepared juice. The juice should completely cover the peaches. Wipe the rims with a wet paper towel before you add a lid and band. Once the peaches have been processed they may float or even shrink a little. That’s okay.  Peaches can be processed in a hot water bath for 20 minutes if you’re preparing pints. If you store them in larger quantities, you will need to process the jars for 25 minutes. Check the National Center for Home Food Preservation website for the safety regulations if you wish to use a pressure canner or want to explore other fruits or vegetables you’d like to can.
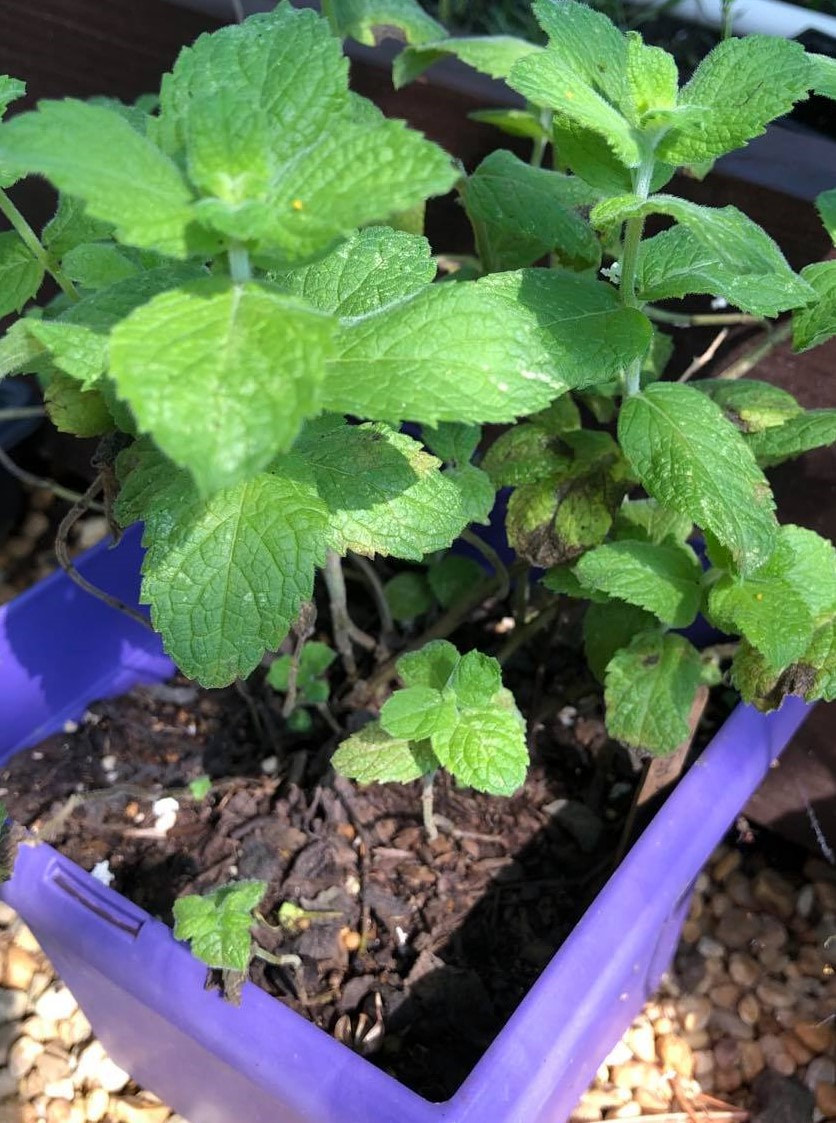
Check out our blog Jarring Up The Summer to learn about what we did with over 30 pounds of Keiffer pears.   Mints and balms (lamiaceae family) are among the easiest of the herbal plants to grow. It doesn’t take much to get them started, and it’s very difficult to kill them. And to add, there are so many different varieties of mint and plants within its family, that you can mix and match flavors to create teas and waters to suit whatever your mood. I tend to select varieties with more subtle “mintiness”. The citrus mints fall nicely into this category. Some of the other fruity flavors like pineapple and apple mint are close behind. Here are a few herbal mint tea blends that I find refreshing just before my Saturday morning garden rendezvous or as a calming end to a busy day.
Lemon Balm Tea ¼ cup fresh lemon balm leaves or 2 Tbsp dried leaves 12 oz water Sweetener Pineapple Lemon Balm Tea 1 Tbsp dried pineapple mint 1- 1½ Tbsp dried lemon balm 8 oz water sweetener Citrus Tea Blend 1 Tbsp dried lemon balm ½ Tbsp dried orange mint ½ Tbsp dried apple mint 12 oz water Sweetener A quarter cup of fresh leaves is about the equivalent of 2 tablespoons of the same leaves dried. Some herbalists say the flavors are more intense when leaves are dried rather than fresh, so you use less. I haven’t tested this theory yet since I’ve only been drinking teas from my garden for two years. I definitely don’t claim to be an expert at this, and I am not a doctor of medicine. So, please do you own research and do what is best for you. (I actually do have an earned doctorate- in education:) That said, you can prepare your herbal tea by dropping the herbs into a cloth tea bag or metal tea infuser. Place the blend into the kettle of water and bring the water to boil. If you don’t have a tea diffuser, it’s okay. You can even put the leaves and plant parts directly into the water to boil, then use a fine mesh sieve to separate the liquid from the leaves and stems. There are many who prepare tea this way. I usually boil the water first or heat it in the coffee maker. Then I pour the boiling water right into my tea cup over the diffuser or strainer that I’ve filled with herbs. Most times I use dried herbs, but you can also mix a combination of dry and fresh. If you choose to add the herbs last, you will need to steep the tea for at least 10-15 minutes. The longer it steeps, the bolder the taste. However, be careful that you don’t leave it so long it grows bitter. The flavor is also more intensified if you place a top over the tea to keep the steam in. Once the tea is ready, there are a few ways to sweeten it. I didn’t include a measure for this since people have different preferences. I prefer my tea less sweet than others. (Some may question my southern roots for this reason.) Honey is often used as an organic option. Stevia is a herb you can grow in your tea garden to sweeten beverages. Add them right into your herbal tea blend dry or fresh. You’ll only need one to three leaves for one cup of tea. Be warned. Stevia may alter the taste of your blend just a little, and it is sweeter than sugar. Finally, you may choose to use white or raw sugar. It's that simple. Boil. Strain. Sweeten. Sip. Adding just a few herbs to your garden can yield enough leaves to spruce up your tea life throughout the summer and well into winter. Don’t forget to compost the discarded plant material to feed your garden. ~Penny Candy Read A Refreshing Cup of Tea if you are interested in learning about our early introduction to peppermint, spearmint or chocolate mint. Last summer we finally plunged into drinking herbal teas from plants grown in our garden. We had common mint, peppermint, and spearmint that were nearly growing out of control. We had to do something. And quick! I often tell the story of how we’ve killed many flowers and trees over the years simply because we weren’t familiar enough with the way clay soil disrespects so many plants. But guess what? It doesn’t kill mint. Despite our efforts to plant it in a garden box to contain it, the stuff creeped out into the blackberry patch, it’s poking through our asparagus and it’s moseyed its way to the front of the chicken run. It’s everywhere- especially in the places we had no desire for it to grow. So, we started researching what we could do with all this mint. It all began with a simple soothing peppermint tea that wakes up your senses with a refreshing tingle. The kids swore it tasted like mouthwash, but it had some soothing qualities. We then added lemon balm. I absolutely love the taste. It has the same effect, but the lemon fragrance and flavor makes it much more tolerable and pleasing to the taste buds. Chocolate mint has a dark, earthy flavor. Although I can tolerate the tea, some people prefer it for cooking. I’ve thought about using it in chocolate brownies to give them an unexpected kick.
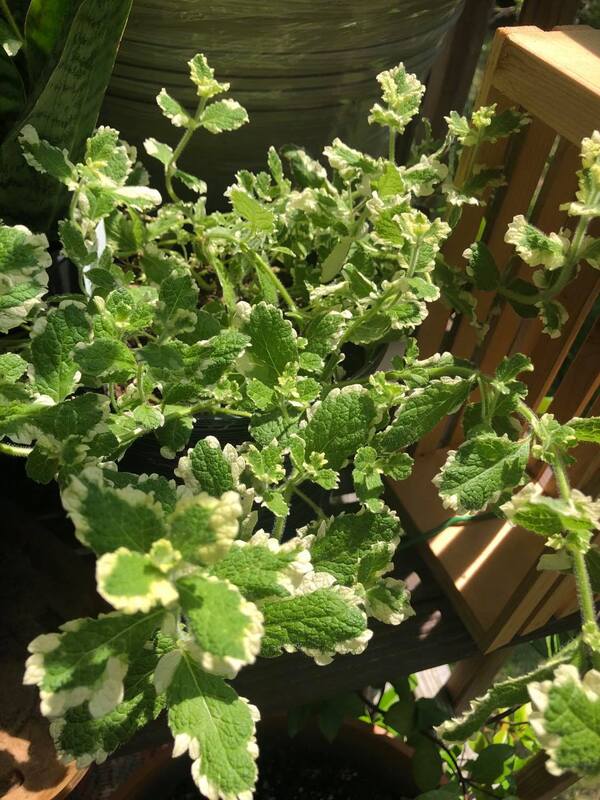
Tinkering with these mints has really piqued my interest in herbal teas. I’ve always preferred tea over coffee. In fact, when we moved from Charleston back home, we filled an entire 30-gallon black trash bag with tea alone. But there is something about snipping leaves from my own backyard that has got me rethinking my whole tea game. So, with the total renovation of our garden, I decided to dedicate space to a tea garden. We have a few plants in the space already, English lavender, lemon thyme, stevia, and rosemary. But many of the plants we intend to dry this year are interspersed throughout the yard, in pots, beds and patches. We’re debuting a few more mint varieties: apple, grapefruit, orange, and pineapple. Each one is so unique. Aside from their intoxicating scents, each one holds its own beautiful qualities. The leaves on apple mint are fuzzy and soft to the touch. The citrus plants both have orange and red tints that compliment their greenery. Pineapple just may be my favorite with its variegated leaves. It makes a beautiful addition to a container garden or patio display. In addition to mints, we’re growing chamomile, echinacea (purple coneflower), bee balm (monarda/bergamot), calendula, and yarrow. Some of these were already a part of our pollinator garden, while others were added to enhance our herbal teas. We have not tried raspberry leaves and rose hips, but we have so many, we will definitely be testing them out as well. When I was a little girl, I remember my parents pulling mint from a ditch in our back yard to make a refreshing tea. In the winter, my mother would boil slivers of ginger root and lemon peels to treat our colds. Occasionally, a few slices of onion would be added. She often talked about wandering through the woods with her father looking for wild native plants that had healing properties. While our grandparents and great-grandparents knew how to forage the land to keep themselves healthy, younger generations are void of this gift. It is my hope that I can learn more about the very weeds we so feverishly rush to yank from our gardens each year and gather facts on how to use them for our benefit.
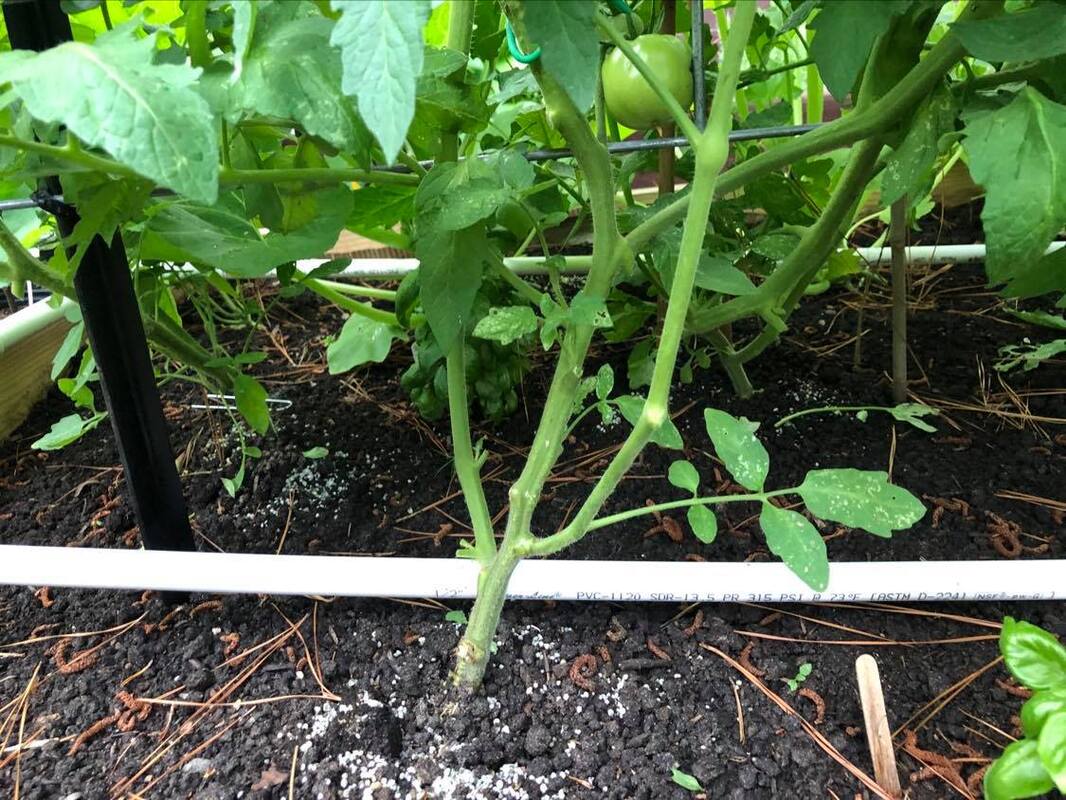
~Penny Candy  The spring heat and unexpected rains have really benefited our tomatoes in a major way. These were among the first we put into the garden back in mid-April. No matter how much you water your garden, nothing beats a refreshing natural rain and a good fertilizer. You can see how these plants have really flourished over the past few weeks, and they are nearly growing out of control. It has been raining on and off for a few days. So this weekend, we grabbed the garden shears and some plastic-coated garden wire and headed out to tackle the job of pruning the tomatoes. The first thing we had to do was use the garden wire to train some of the sprawling vines to the trellis. We cut our wire into strips of 6-8 inches depending upon how thick the vine was and how close we could get it to the trellis. We twisted it on the fence side and let the loop hug the plant. Tomato vines are very sensitive and any rubbing or scraping can cause the skin to peel back from the plant. This can introduce disease to the plant. So do whatever you can to avoid any unnecessary damage or bruising.
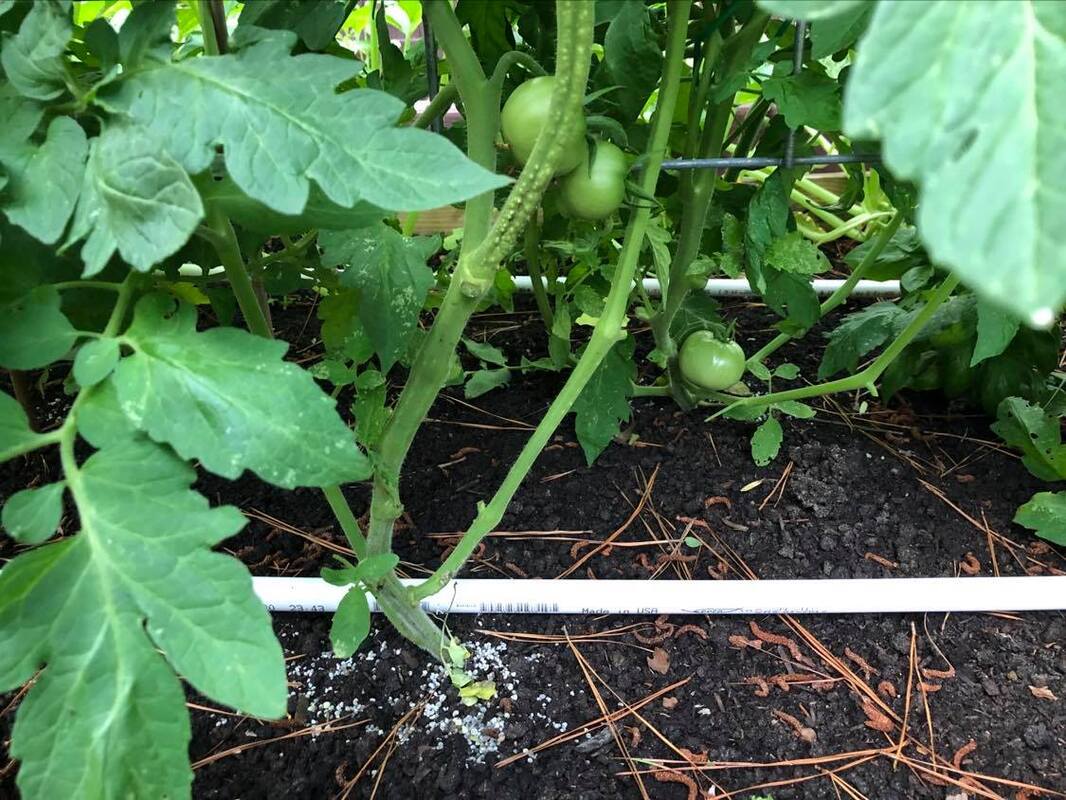
After we tied up all the larger vines with flowers, we examined the bottom of the plants to see if there was any leaf damage. Tomatoes do not like for their leaves to touch the ground. Any yellowing or spotted leaves that were touching the ground were removed. We used our shears for this job as we wanted clean, neat cuts to the plant. We discovered some large suckers growing near the bottom, some even had roots because the vines made contact with the soil. Tomatoes will root and sprawl along the ground if you don't stay on top of them. We cut some of these suckers and extra foliage off, because they appeared to weigh too heavily on the plant. We also cut off large vines or suckers that were growing below flowering vines and could not be secured to the trellis. Be careful that you only do this on indeterminate plants. Determinate tomatoes set all fruit at once. If you remove vines that have flowers or could potentially flower, you will decrease the productivity of the plant.
The plants we pruned this weekend were a mixture of hybrid and heirloom. We have Better Boy, Park’s Whopper, Yellow Pear, Sweet Million and Lemon Boy growing in this box. They cleaned up rather nicely after we pruned away the excessive bottom growth that could potentially steal energy that could be used to produce nice tomatoes. In just a few days after the pruning, the plants extended well beyond the height of the trellis! We can't wait to begin to harvest a few.
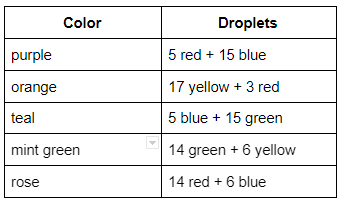
 Did you know you could make a colorful egg basket even more beautiful? I recently received a call from a frequent customer requesting two dozen eggs. This is not an unusual request. What was different, however, was the specific request for blues and whites only. Occasionally, we end up with a carton of light-colored eggs- blue, olive, tan, pink - because there are some people who simply don’t trust the idea that a chicken could lay anything other than a brown or white egg. We are not a huge farm. Although we collect 14-16 eggs per day, it would still take a few days to fulfill a request for two dozen blues and whites only. Then I realized what this was all about: Easter. She wanted to dye the eggs. Our kids have always been skeptical of boiled eggs, so we never dyed many. One kid would only eat the white; one would only eat the yolk. If we boiled too many, they would go to waste, and we’d have to feed them back to the chickens. Since then, they’ve learned to share their eggs, and they eat them on salads. This year, they were eager to dye their multi-colorful basket of eggs.  Browns, blues, tans, and speckles. These eggs dye just the same as white. Here’s how you do it. Ingredients: food coloring vinegar boiling water You will need plastic bowls, cups or containers for each color you plan to use. Don’t bring out your best china. You want to use containers that are disposable or will not stain. To each container add ½ cup boiling water and a teaspoon of vinegar. You will then mix the food coloring to create the pigments you want to try. For egg dying you will need approximately 20 droplets of the desired color to achieve results. You can also mix any combination of colors to garner different shades. The chart below shows the standard colors, but you can create your own funky shades by experimenting with your own recipes. Keep in mind that the colors you produce will be affected by the amount of time the egg is left in the mixture. For lighter colors, try as low as 30 seconds to a minute. For darker hues you will want to leave the eggs in for at least 2 minutes. These kids insisted on bathing the eggs for 3 minutes or more. Their results were very dark eggs with silver and bronze tones.
The natural egg color will also affect the outcome of the dyed result. We started with a few white eggs, blue, different shades of brown and one speckled egg. This metallic egg was created by leaving a white egg in the purple mixture that contained 10 additional red droplets (10 red + 15 blue) for approximately 7 minutes! This chocolate-looking egg was created by placing a brown egg into the rose mixture. You can also drop the eggs into multiple solutions to create unexpected color variations or even two-toned eggs. Be creative and have fun!
 Spring is on the horizon, and what could be more exciting than planning your summer garden? There are some things we could be planting right now- peas, potatoes, onions, brassicas, but we have so many collards and cabbages still growing from fall that I don’t even feel like putting the energy into thinking about where to even put spring plants. So, we’re focusing on summer and putting that energy into reconfiguring our garden to maximize space. We are in zone 7b with the last frost date scheduled for April 4. Ironically, it was the same last year. We should begin seeds about 6 weeks ahead of the last frost, so we are a little late. Yet, we at least got started. Last weekend we planted tomatoes and peppers. We introduced a few heirlooms to the garden last year. While the bold, earthy flavors of Cherokee Purple and Paul Robeson could not be beat, the hybrids we grow are tried and true. You simply can’t go wrong with Better Boy or Big Boy. They produce nice sized, uniform fruit all season long, and our results were favorable. So all of these will definitely return to the garden this year. We’ve heard some great things about Granny Cantrell, but they didn’t do so well for us. All is not lost. We will give them a second chance. If they don’t produce this year, we’ll be swapping them cross country for something more productive. 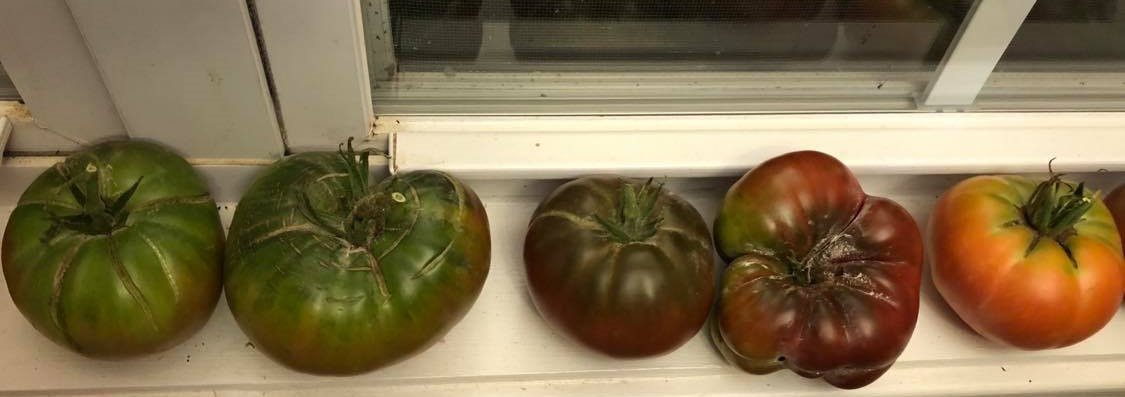 Tomatoes are one of our favorite things to grow, so we decided to plant just a few more varieties to round out our experiment. We’ve managed to collect over 50 different types of large slicers, cherry sized, and even green tomatoes. Among the plants debuting this year we have Kellogg’s Breakfast, Aunt Ruby’s Green, Mortgage Lifter, Pink Brandywine, Black Krim and Chadwick Cherry. These are all heirlooms with their own stories.  This weekend we added cucumbers, eggplant, zucchini, and squash with herbs and a few melons to follow next weekend. We spent just as much time deliberating over cukes and melons as we did tomatoes. Since we ran out of bread and butter pickles and relish, we definitely wanted to be sure we had enough national pickling cukes to replenish. For fresh eating and salads, we chose Marketmore and Yomato. We’ve done a great deal of research on squash borer resistant varieties, so we will definitely be offering a part 2 to last year’s post about squash. I wish we had done some comparable research on the pickle worm- another garden nightmare! But at least we got enough cucumbers for pickles and relish before that troublesome pest took over. So, as I wrap this up, we got so busy with personal matters these past few months that we didn’t get around to getting our greenhouse erected. That has been put on the to-do list for this spring and summer. That means we are growing in the garage again. Our plants were a little leggy last year which can cut their chances of surviving the heat of the early spring sun here in the south. This year we added heat mats and grow lights to help our plants get off to a healthy start. Happy growing!  |
AuthorI'm a wife, mother, daughter, educator, writer and hobby farmer. Welcome to my world of simply living. Archives
December 2023
Categories
|


 RSS Feed
