|
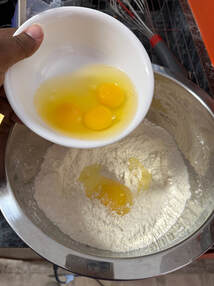
Who said fruitcake had to be the dry, fruit-filled compacted brick that you're visualizing right at this very moment? It doesn't. Try this traditional pass-along recipe for a moist, tasty alternative. Even my friends who steer wide and clear of fruitcake have raved over this cake. 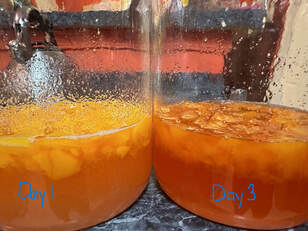 My first experiences with this cake are etched in the memories of my sweet mother-in-love who started this cake with her sister each fall. She had jars going on the counter for weeks and baked the cakes over several days. At that time, I never imagined myself doing the same. Although I am no stranger to pass-along concoctions, fruitcakes were never one of my must-haves during the holidays. Organizing our family's fruitcake fellowship each fall has not only made me more tolerable of the cake, it has also broadened my perspective about why people put the time and effort into preparing them. 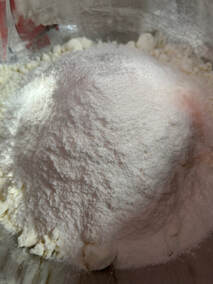 What makes this cake lighter and so different than the dense product we are used to in a fruitcake is that you begin with a golden cake mix. Yeah. That's what I said. This is a doctored cake mix batter, but the way it comes out after adding all the ingredients, you wouldn't know. You will bake two cakes separately, so use only half the ingredients to begin the first cake. Open one box of cake mix and pour it into a large mixing bowl. To the mix, you will whisk in one small box of instant vanilla pudding mix. Many bakers use pudding to create a silky, moist texture in their cakes.
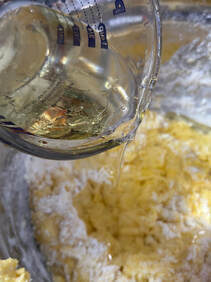
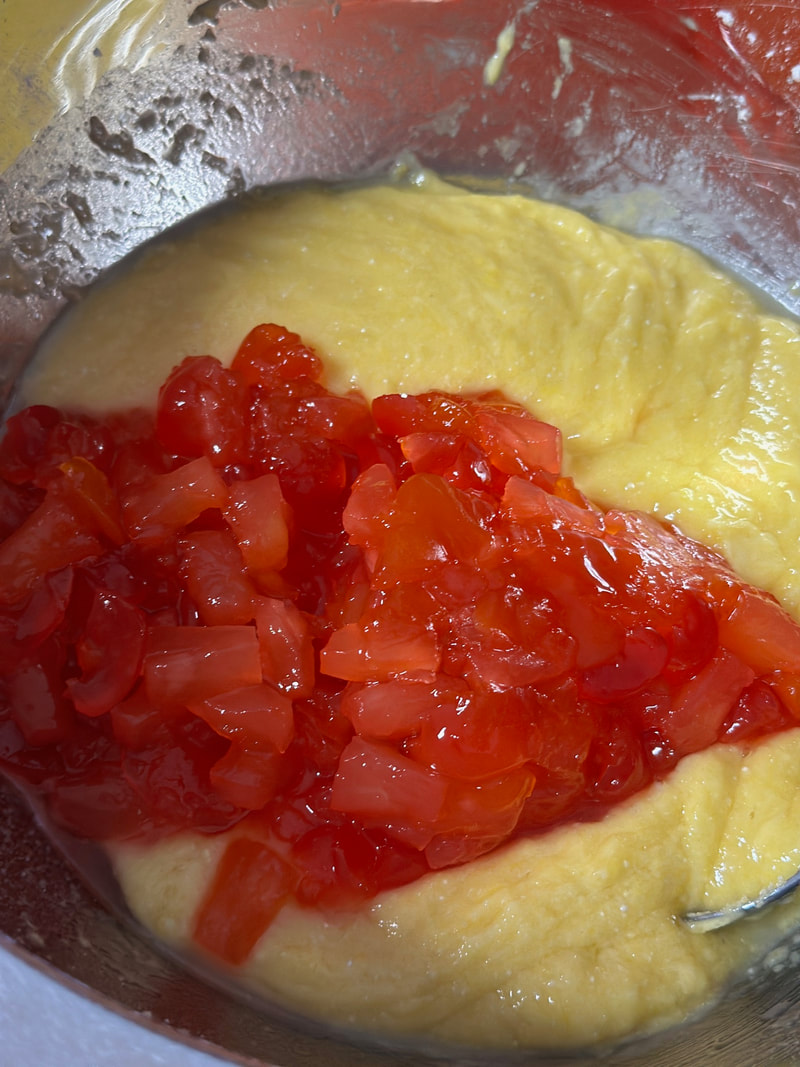
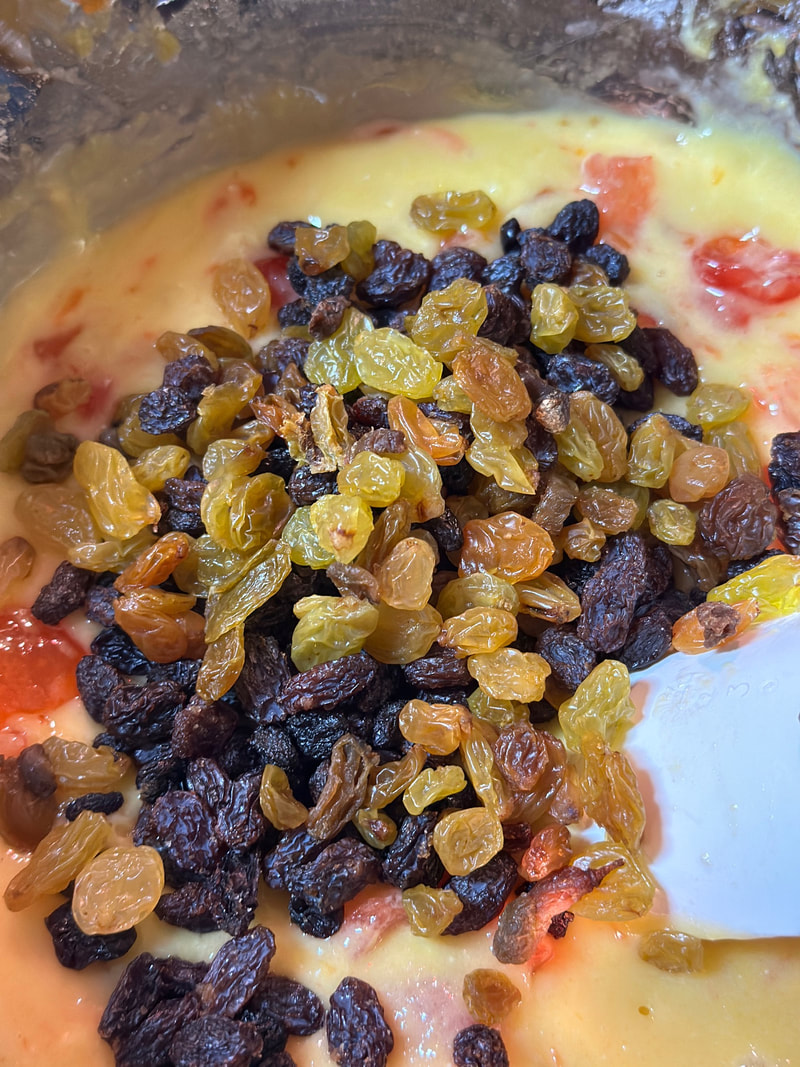
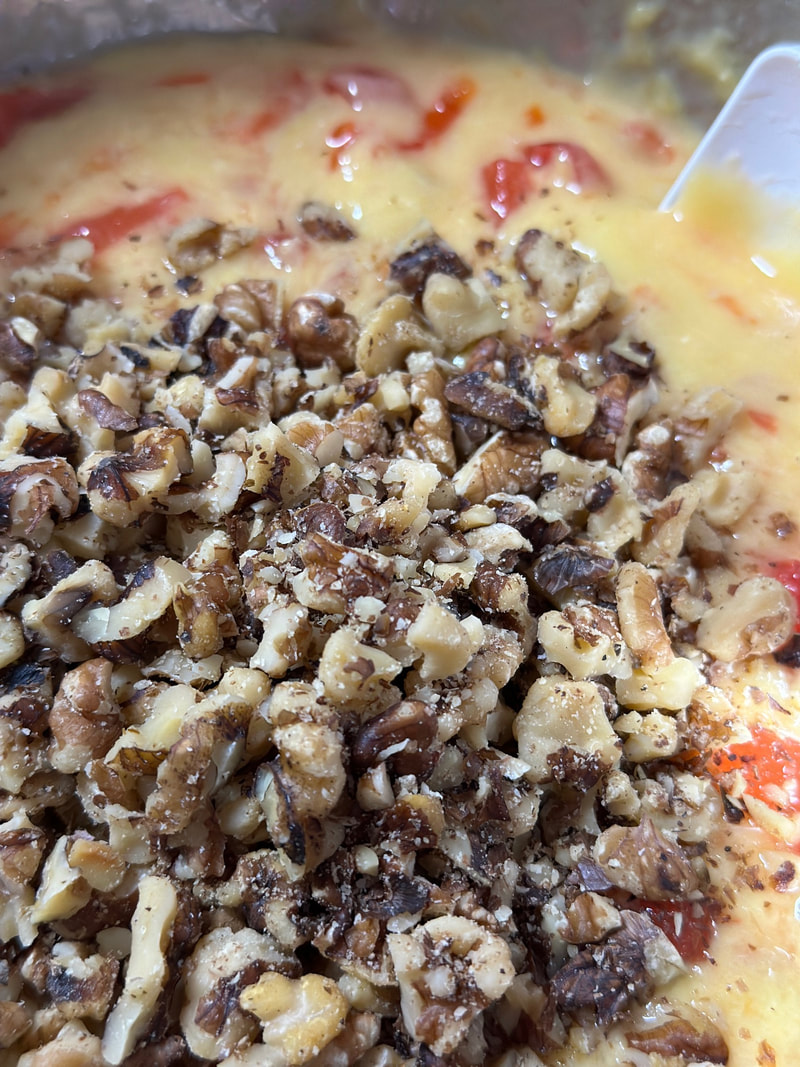
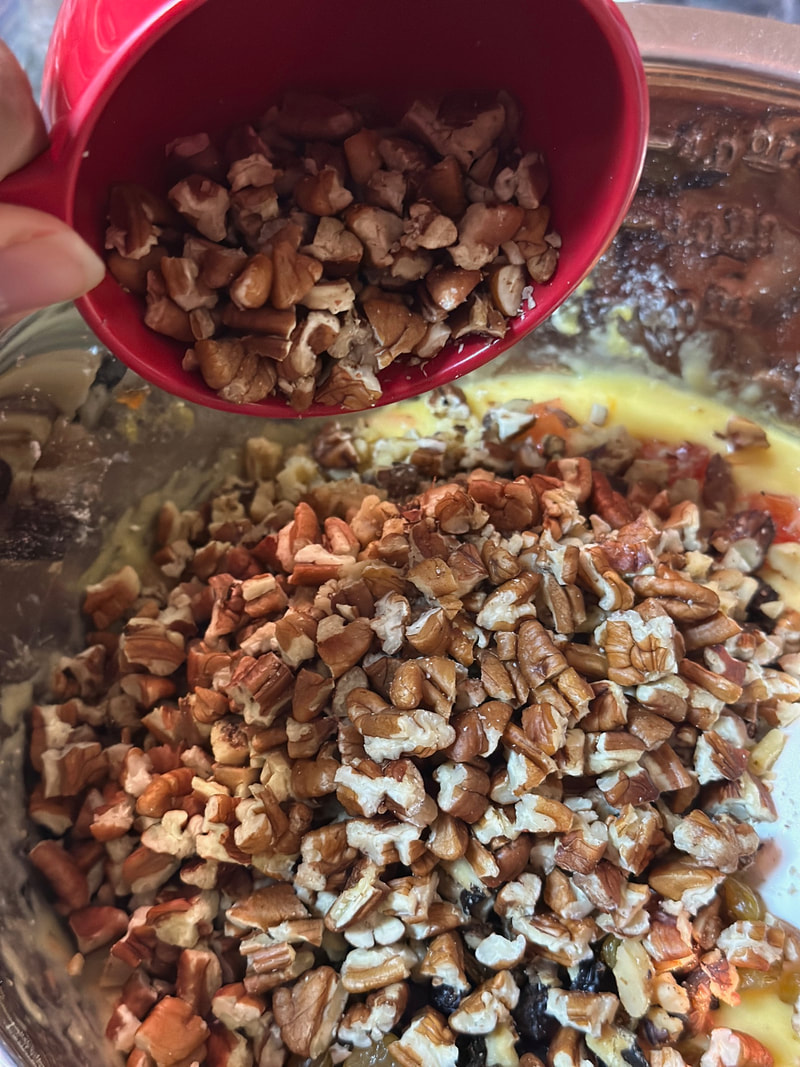
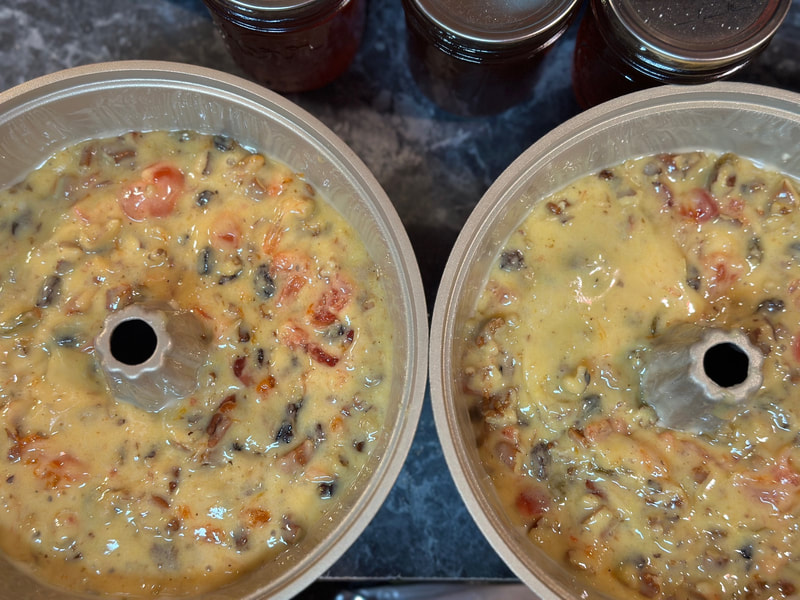
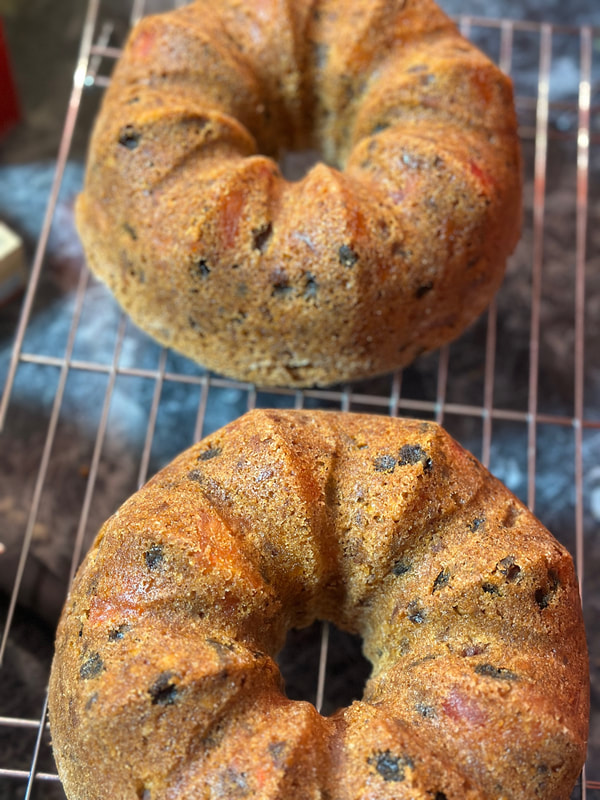
Stir in four eggs. I always stir one in at a time until the yolk breaks, and it is slightly incorporated. And yes, I said stir. This batter is super simple and does not require a mixer at all. Add two-thirds cup of vegetable oil. 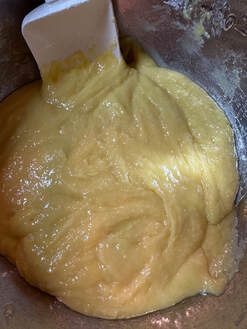 Stir the ingredients together until they are well-incorporated. A spatula or large spoon will work fine. Fold in half the drained fruit and one cup each of raisins, walnuts and pecans. For these cakes, we mixed one half cup golden raisins and one half cup black raisins. We baked these cakes in 6-cup Crofton mini bundt pans for approximately 55 minutes. In a regular 12-cup bundt pan, bake the cakes between 60 and 90 minutes. This time will vary based upon your oven. Our full-sized fruitcakes bake 1 hour and 10 minutes for a moist, fluffy cake. Remove the cake from the oven and place on a cooling rack for 10 minutes before turning it out to cool completely. 
0 Comments
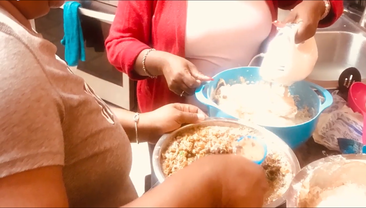 I love everything about fall. The weather. It’s still warm enough to get some things done without suffocating in the heat. The gardening. The soil is still warm enough to allow a few more seeds to get started for a fall garden, and you can pick greens and other leafy vegetables all through winter. The holidays. Who doesn’t enjoy family gatherings around food and reminiscent conversation? I love the baking. Spicy and rich cakes like carrot, red velvet and coconut are all baked this time of year. And what better way to bake them than with and for family? 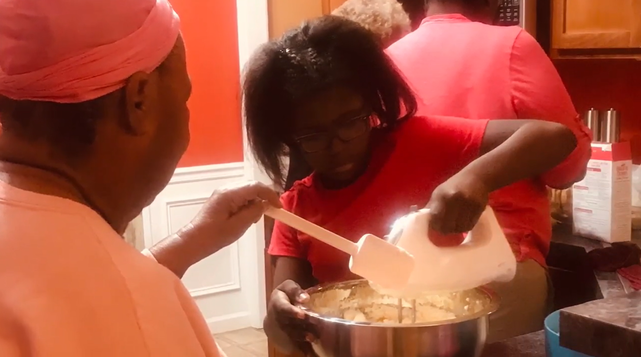 I love my family! We are vast, but we were taught to value traditions and make time to spend together doing things we love. When we were growing up, our grandmother had everyone over to her house in the country for Christmas. Although her house was much too small to contain us all, the weather was mild enough in South Carolina that some of us could sit around on the inside while others played, talked and laughed outside. We continued to meet, rotating from house-to-house well after my grandmother smiled on us from heaven. Then, life changes caused the gatherings to become fewer and fewer.  In spite of life’s obstacles, we still create ways to get together. One gathering, the Family Fruitcake Fellowship, began at my sister’s house back in 2014. Our mothers, sisters, cousins and aunts filed in around a huge cake batter. Each person who walked through the door brought something to add to the mixture- sugar, nuts, raisins, cherries, flour……Everything was measured out, poured in and mixed up. Each person brought their own baking dish to fill and take back home to bake. This fruitcake affair turned into an annual event that was nearly annihilated by the pandemic. But we are grateful for time and innovation. This year, we resumed the fruitcake fellowship- with a twist. Led by our cousin who is deemed the family baker, we each received a jar of starter for a 30-Day Friendship Fruitcake, along with a gallon-sized jar and a copy of the recipe. We started with a virtual call in mid-October where each of us got started with preparing the fruit. After thirty days of mixing, stirring and an occasional licking of the spoon, we met online once more for baking day. Some baked, while others logged in for the tips. I ended up baking my first two cakes five days after the thirtieth day, so I can personally attest that the preparation for this cake is fairly easy, and the recipe is truly forgiving. If you bake a few days early or late, the results are just the same. Click here to download the recipe.
I had two jars going, so I drained the fruit from both jars. I baked one cake immediately. Half the fruit from the batch was spooned into an air-tight container and placed in the refrigerator until it was baked a full month later. The second batch of fruit was placed in the freezer and used the same day- thirty days later. Dr. LeConte' R. Middleton 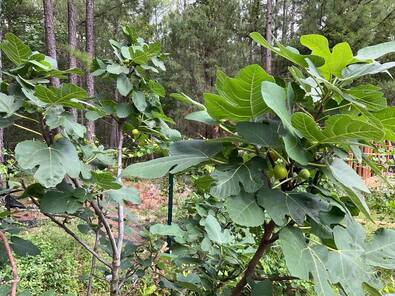 Another summer growing season is in the books. We had our first light frost about a week ago, and the tree shuffle has begun. Citrus trees don’t tolerate temps below 40 degrees too well. So we brought the limes, lemons and oranges inside the garage to protect them until the temperature rises (and it will) and the fruits ripen. They are almost there. We also covered or sheltered a few other frost-sensitive plants like roselle, avocado, peppers and house plants. Although we have a number of one-gallon figs to consider as it gets colder, we left all of the figs outside and took inventory. One hundred twenty-three. That’s how many individual fig plants we have. Of those, there are 66 different varieties. I know that sounds wild, but growing figs is an addictive hobby. Once you grow and experience the unique characteristics of each plant, it is difficult to turn back. 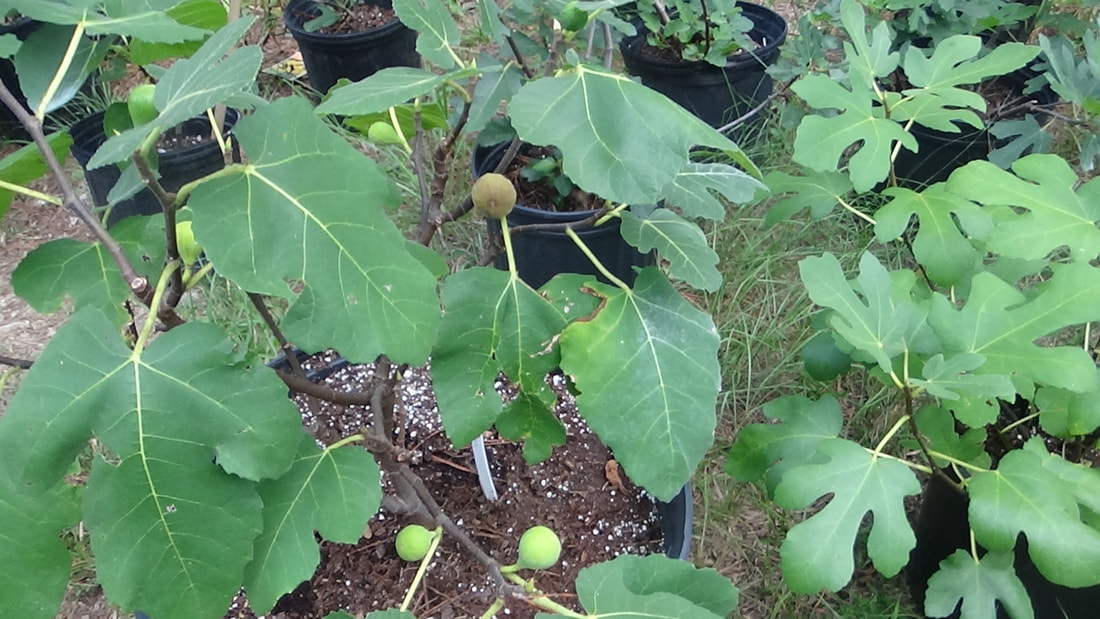 When you think about figs, Brown Turkey most immediately comes to mind. This is the reddish-brown fig that many of us remember from our backyards when we were growing up. In my case, it was our neighbor up the street who had a giant fig tree that filled his entire back yard. I don’t think there was anything else back there except an old shed and that gigantic tree. What I remember most is hiding beneath those huge limbs and leaves that draped the ground like a humongous hoop skirt. There were many late summer evenings that I filled up on fig fuel until my belly ached. It seemed as if we picked figs from that tree all summer long. He generously shared his treasures with the ladies who came to my mother’s beauty salon right next door. I used to think these were the only figs in existence until I jumped into this quest to fill our yard with food year-round. Boy was I wrong! I’ve learned so much from mentors all over the globe about the hundreds of thousands of fig varieties that exist, their origins in different countries and the types that grow well in our climate. There are also figs to cover early and late season to extend your crop depending upon your growing zone. Our mild South Carolina climate allows us to take advantage of some of these benefits. For starters, unless you live on the West Coast (or other Mediterranean-type climates), you will need to invest in common fig varieties. There are figs that require a fig wasp that only lives in certain climates. The fig fruit is actually a flower that blooms inside out. Wasps enter the fig through the ostiole or eye, which is a circular opening on the underside of the fruit. Once the wasp pollinates the fruit, the fig explodes with flavor. But all figs do not require this extra step to produce an appetizing flavor. Common varieties do not require a fig wasp at all to produce fruit or flavor. You simply need to find the varieties that perform best in your climate. Clemson extension offers a few of the basics you can likely pick up at your local nursery. Celeste, Brown Turkey and Chicago Hardy are quite common and represent what comes to mind for most when they think of figs. Small, plump, bulb-like purplish fruit with a burst of sugary sweet when you pop it into your mouth. I’ll share a little about those and a few other common varieties that you simply can’t go wrong with when adding them to your landscape. These are easy-to-find, easy-to-grow varieties.  Celeste Very reliable. A very early sugar fig that begins ripening a breba crop as early as mid-July here in South Carolina. The breba is a small crop of figs that grows on last season’s wood. The current season’s figs will emerge from new growth. Celestes may ripen from August through September. 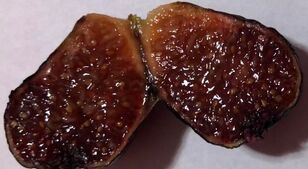 LSU Purple Reviews are mixed on this variety from Louisiana State University. The fruit are elongated purple tear-drops with an amber-colored interior. Some really love the flavor, while others believe it is far less intriguing than the other LSU varieties and less impressive of figs in general. 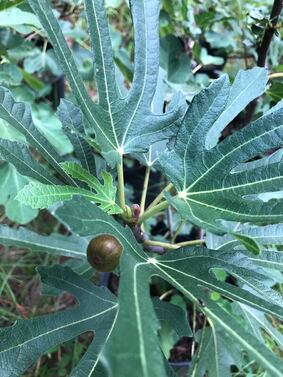 Ischia Green
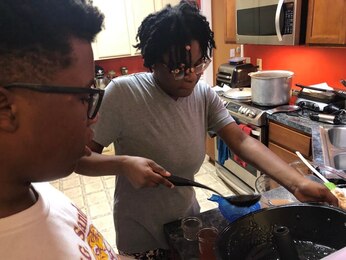
 is another fairly easy tree to grow. Producing a medium to large green fig with bright, strawberry-colored interior, it boasts a berry flavor that many love. The trees we grow were sourced by a North Carolina fig enthusiast, and it takes on a sprawling growth habit that bushes out. Violette de Bordeaux Considered a berry-like fig, this plump, purple spotted fig is very easy to find at your local plant nursery. They start out in a dimpled squat-like manner that grows slowly. Then it expands, fat and round, just before harvest. If you want to grow your knowledge about figs, there are many groups and forums online that can help you. 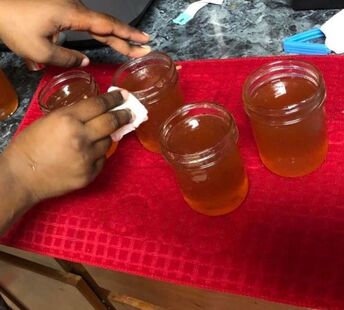 I had the pleasure of working with two teenagers on a project to learn how to preserve food. The session began with applesauce and continued with making apple jelly from scratch. We started with 6 pounds of apples, which we turned into 20 jars of homemade applesauce. We had no intention of trashing those peels and cores. We turned our scraps into apple jelly, and it’s fairly easy to do. This project started with a variety of apples- Granny Smith, Pink Lady and Fuji. If you want to know more about the apples and how we prepared them for applesauce, read the post titled Frugal Living: Making Applesauce. While we prepared the applesauce, the scraps were placed in a large stock pot. 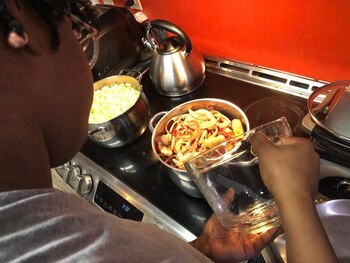 To the discarded peels and cores from six pounds of apples, we added six cups of water. We brought this up to a boil then simmered it on low heat for 30 minutes. If you don’t have access to any apples, but you still want the experience of making your own apple jelly, take the shortcut and use bottled apple juice. My favorite is Organic Honey Crisp. You can also use this same method with grape juice. I know what you are thinking. Why should I spend all this time making jelly on my own when I can pick up a jar right off the shelf, especially if I’m buying the juice? Believe me. Homemade jelly tastes nothing like what you buy from the store. If you can get your hands on free apples from your own backyard or some other source, well, that makes it taste so much sweeter. 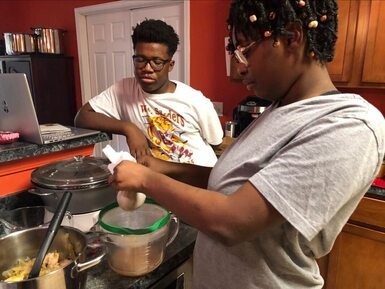 Strain the juice. This can be done using a simple stainless steel mesh strainer since the pieces are fairly large. For fruits with smaller seeds or skins that retain liquid like blackberries or muscadine, I use cheesecloth. But that is not necessary here unless you have a large amount of flesh attached to the skins. Then, you would wrap the scraps inside two to three layers of cheesecloth and squeeze or twist the ends to release the liquid. The magic of these loosely weaved threads always surprises me. Three cups of apple juice are needed for this recipe. We used our electric jelly and jam maker for this. 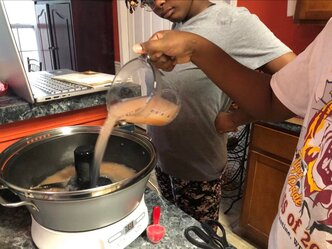 First, whisk four tablespoons of pectin into the apple juice. Add one half teaspoon of butter to prevent as much frothing as possible. Select the Jelly option on the machine and place the top on the pot. About three minutes in, add the three and a half cups of sugar. The machine we use beeps when it is time. The total time to prepare jelly in this automatic maker is 25 minutes. This may vary depending upon the appliance you are using or if you cook it on the stove.
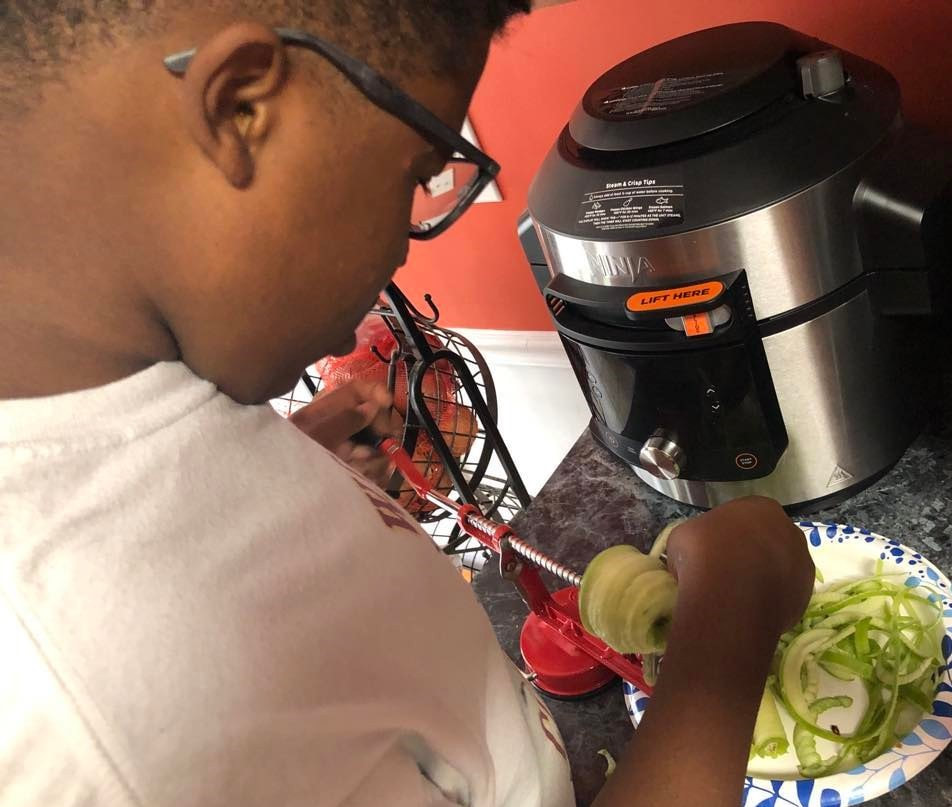
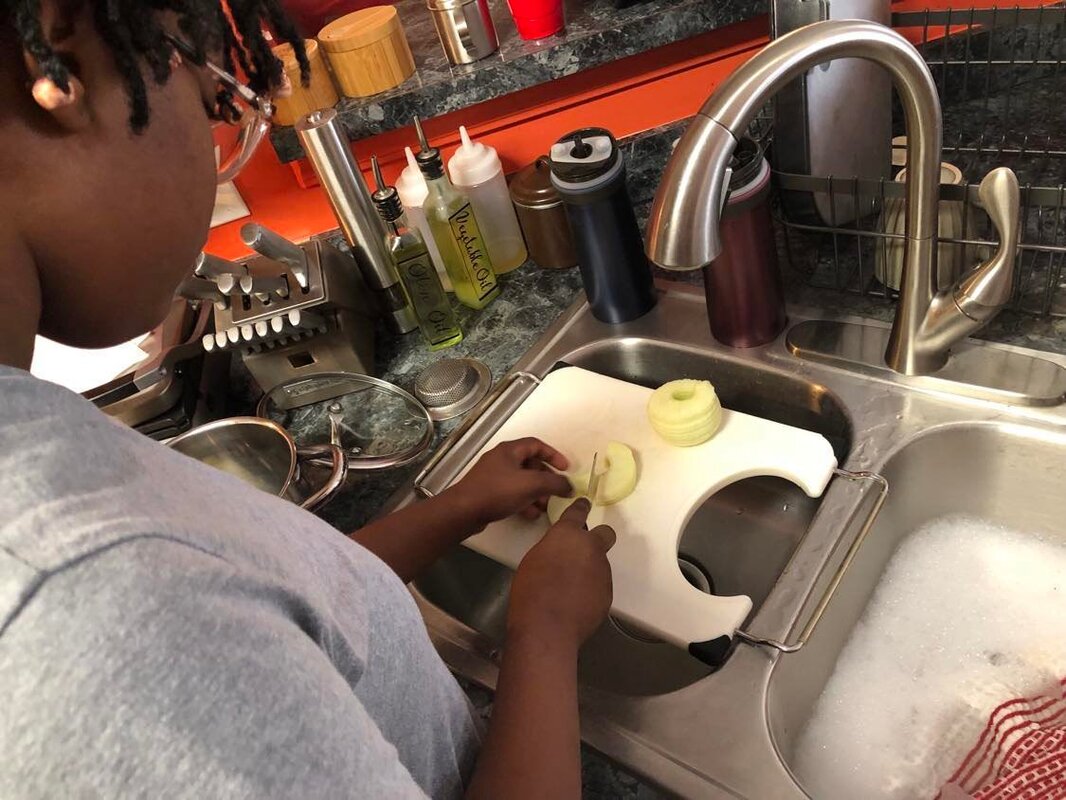
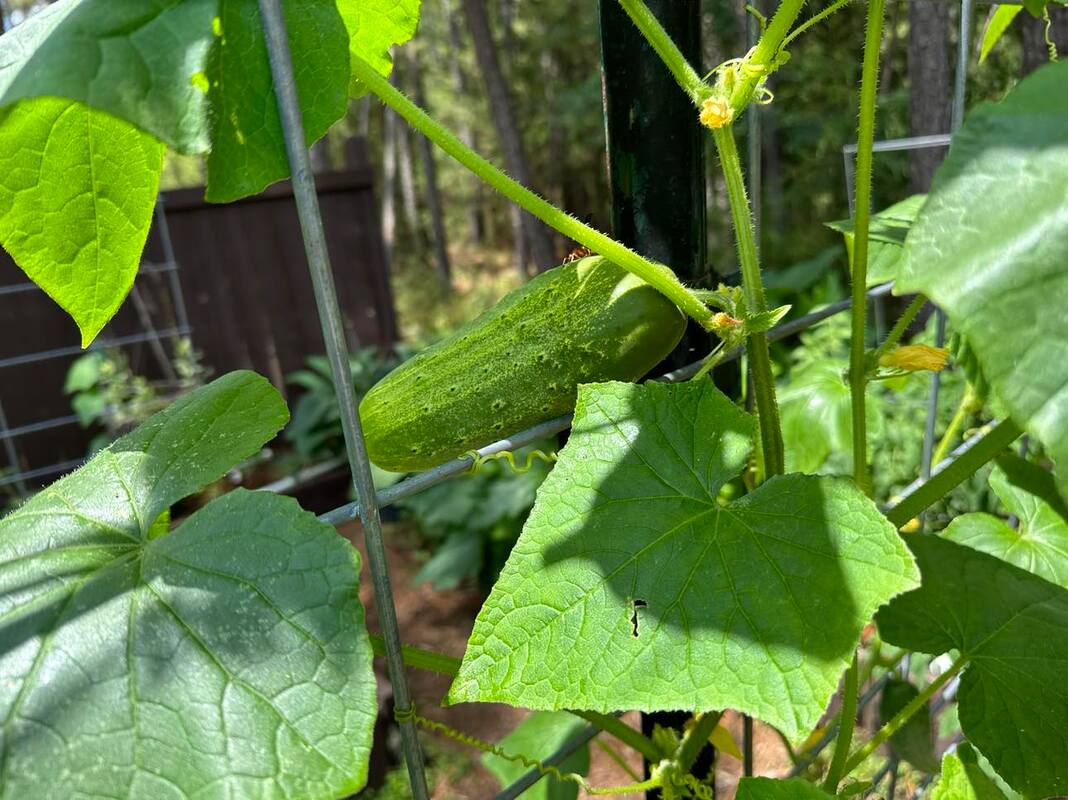 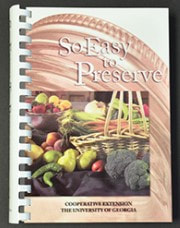 These hot summer days with indexes over 105 degrees have really been a challenge for our tomatoes and cucumbers this year. In mid-July our garden is normally overflowing with more vegetables than we can handle. This year, not so much. Even so, we still managed to pick enough cucumbers to make some sweet pickle relish. Problem is, we are still super busy, so some of the cukes were a little yellow- a sign that they are overripe. You can still use those overripe cukes if you process them quickly and remove any large seeds. I read somewhere that they could taste bitter or tart. I’ve occasionally used them for at least three years and have had no problems. I do like to sample before I use the items just to make sure they are okay. Be mindful though. I am not talking about large, bloated cucumbers that are completely pale yellow all over. These are definitely past their prime and would probably be best used to harvest seeds for next year’s garden. We have several pickling and canning books, but after taking the Food Preservation Course with Clemson Extension, I felt compelled to purchase Andress and Harrison’s So Easy to Preserve published by The University of Georgia. It is packed with USDA-approved recipes that any home gardener or cook could easily master in the kitchen. My son and I make sweet pickle relish every summer. We love our recipe, but decided to switch it up a bit and try this one in the Georgia book. Sweet pickle relish is a great way to get those cukes off the counter. For the most part, the recipes are essentially the same. The slight differences are that this one requires apple cider vinegar as opposed to white vinegar. It also uses twice the amount of onion that we use. As expressed earlier, just because it is summer doesn’t mean we are not still crazy busy. We chopped all the vegetables the day before and placed them in the fridge overnight. Each vegetable was in its own separate air-tight container to keep them fresh. The next day, we started early. All the chopped ingredients were combined and mixed well. Pickling salt was added as indicated in the recipe. Then the vegetables were submerged in water, covered with plastic wrap and set in the refrigerator for 2 hours. During this time, we washed the jars, gathered lids, filled the pressure canner and heated the water. Once the water was hot, we turned the burner off and placed the jars in, being careful not to splash or burn ourselves. 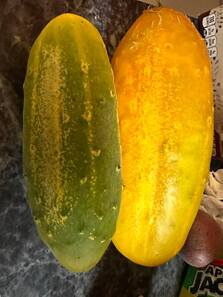 The cucumber on the left is slightly scorched by the sun. It is perfectly fine to use in fresh salads if it is not bitter. The one on the right is bloated and way past its prime. Core it and dry the seeds for next year's plants, compost it or feed it to your animals. 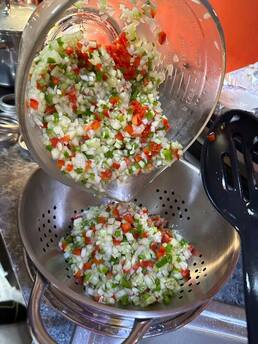 About thirty minutes before it was time to remove the vegetables from the fridge, we started the brine. By the time you take your vegetables out and drain the excess liquid, the brine should be boiling. Add the vegetables to the brine and bring it back up to a simmer for 10 minutes. It is now time to jar it up. Spoon the relish into the clean, warm jars. Always wipe the rims with a damp paper towel or cloth before adding the lids and bands. Try not to screw them on excessively tight. Place the jars in your canner or water bath with at least 1 inch of water above the lids. Bring the water back to a boil and process for 10 minutes. Remove them and wait for the “pop”! This relish is good, but you will taste the onion quite a bit. We prefer a more subtle taste, so we will probably stick with our original recipe. I may share that one in a different post. 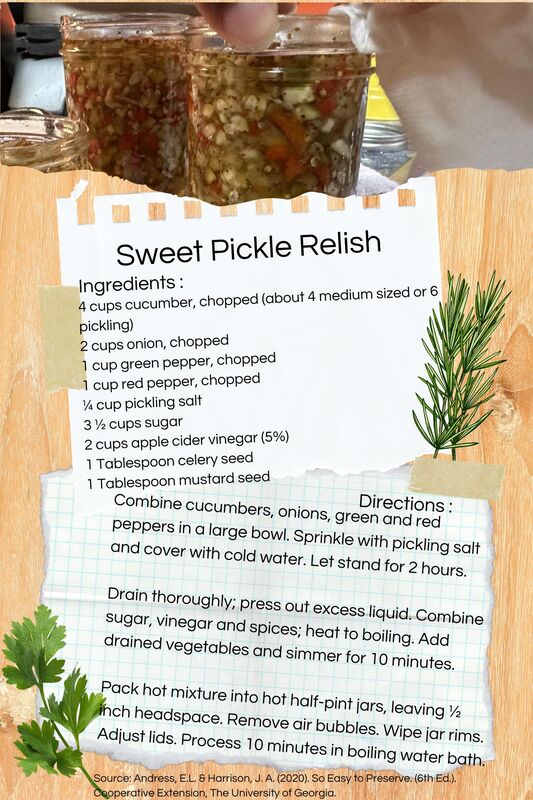 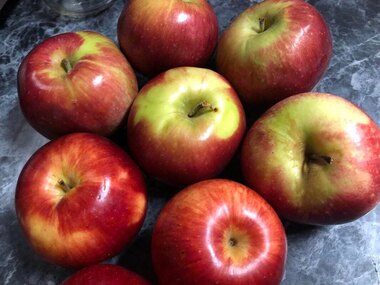 I had the pleasure of working with two teenagers in my kitchen recently. One of them was working on a project and wanted to make jelly from scratch. Well, needless to say, that was right down my alley. In just a few hours we turned 6 pounds of apples into 20 jars of homemade applesauce and apple jelly. Let’s roll back through the steps. We started with a variety of apples. Granny Smith is a hard, tart apple often used in pies. It offers just the right amount of bite to be added to any apple desserts. We added a few Pink Lady apples. I almost exclusively buy Envy and Honey Crisp, so this was the first time I tasted Pink Lady. It’s surprisingly sweet and has a floral finish. We also had a bunch of small Fuji apples which are also popular in baking and applesauce. We used several of them to create a nice mixture. The texture of this one was a little softer than the other two. Working on this project reminded me of the many treats we've prepared over the years when we had an excess of pears or apples. We made pear sauce, apple-pear sauce and then apple butter, because we got tired of eating all the sauces. This time, we pushed it to another level. The challenge in this project was to use everything. So, after making this applesauce, we used the peelings and scraps to make jelly. (And I'll just have to say this was probably the best apple jelly we've ever made!) Nothing goes to waste in a frugal lifestyle. This was a perfect lesson for these teenagers in a time of wastefulness. Check here for our blog on Apple-Pear Sauce. We set up stations that made quick work of the task. First, the apples are peeled using a gadget we scored just before quarantine. This apple peeler makes the process so much easier; however, setting the blade to cut just right according to the size and texture of the apples can be tricky. If the blade is too tight, it cuts too deeply into the flesh, and the apple could begin to fall apart. If it’s too loose, the blade just rides along the skin and doesn’t cut anything. It’s important to find the middle ground. It may take a few trials to get there and will likely be different for each variety. Once the apples are peeled, I like to use a paring knife to make sure there is no lingering skin or seeds embedded. Then, the apples are chopped into small pieces about a half-inch wide. The peeler slices the apples into rings, so these small chunks take very little time to break down. The apple chunks are placed into a stock pot. Lemon juice is added, and it is important to stir to keep them from turning brown. Add the apple juice, place the lid on the pot and bring the mixture to a boil over medium heat. We prefer honey crisp apple juice, but your favorite brand should work just fine. The apples are cooked until they become soft. The tines of a fork should easily push right through the pieces, or you will notice the apples beginning to break down on their own. It should take about 20-30 minutes once the liquid begins to boil. You will want to stir or turn the apples a few times to prevent them from burning or scorching. Once the apples are soft enough, remove the pot from the heat and use a potato masher to break them down further. We used an immersion blender to separate large chucks, making the applesauce much smoother. Add brown sugar to sweeten. Cinnamon or other spices can also be used to suit your own taste. 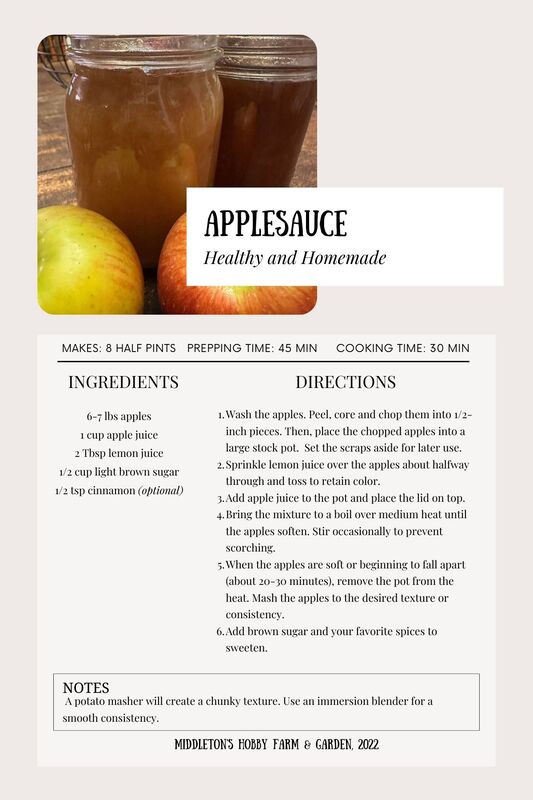 Click here to download. This applesauce is perfect for immediate use and will hold up nicely if properly canned. After tasting this applesauce, our kiddos insisted on opening one of last year’s jars of Apple-Pear Sauce. It tasted just like it did on the day it was jarred. To Can the Applesauce: 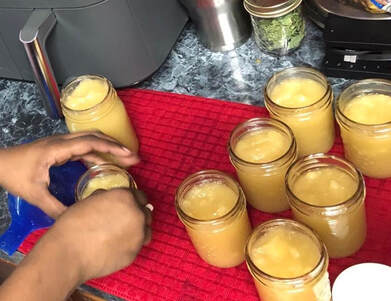 Applesauce can be safely canned using the water bath method. Fill a large stock pot with water and bring it to a boil. Wash the jars and place them in the pot to sterilize them while you prepare the applesauce.
Once the applesauce is ready, you will fill the warm canning jars with the warm applesauce. Wipe the rims with a damp paper towel before adding the caps and rings. Place the filled jars into your canner or stock pot. If you are processing using the water bath method, be sure the water is at least one inch above the tops of the jars. Bring the water back to a boil and process at a rapid boil for 20 minutes. Be sure to listen for each lid to “pop” once the jars are removed from the water bath. Any jars that are not sealed should be refrigerated and used within a few days. Read the post on Apple Scrap Jelly to find out what to do with all those apple peelings and cores. You can literally make use of everything. I was pleased to share my gardening experiences on a recent health and wellness panel hosted by the Columbia chapter of the National Council of Negro Women. This organization was founded by renowned educator, Dr. Mary McCleod Bethune, and focuses on empowering women of color in social activism. Each panelist was given ten minutes to share tips or research from their prospective areas of expertise and answer questions from the audience. I must say it was an humbling experience, and I was quite honored to join this panel of true experts as I am an educator, then a gardener. It was very unexpected but liberating to speak about one of my passions- growing food, flowers, herbs and raising chickens. One of the guests asked a question that caught me off guard. Although I started a blog back in 2015, this was my first time speaking publicly about our gardening and hobby farming experiences. I was nervous. I shared a lot but left so much unsaid. The question was, what herbs are good for headaches? During the conversation, I only spoke about the mints- spearmint and peppermint to be exact, but there are so many more. Once the forum ended, my thoughts began to flood about what I should have or could have said or done differently. I’m sure you know that feeling. Well, if I had a do-over- and I’m taking this opportunity to do it over- this would have been a better response. 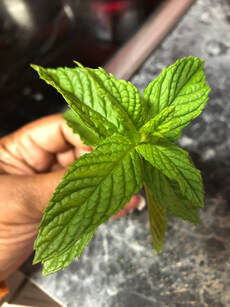 Q. What herbs are good for headaches? A. The easiest herbs to grow and blend for teas when supporting headaches are members of the mint family. Spearmint and peppermint are the first to come to mind. However, my absolute favorite and go-to that I mix with everything is lemon balm. The fragrance alone is intoxicating, and I personally find it soothing. Mints will take off in your garden once you get them going, so it is important to grow them in a space where you can keep them contained. We grow all of our mints in pots. Chamomile and lavender are probably the most popular of the herbs to use for a myriad of things, but stress relief is a primary issue supported by these two herbs. They are both beautiful flowers to add to your landscape. Chamomile can be a bit tricky to start, but once they get going, they can be known to self-seed. The flowers are small, daisy-like with a yellow center and white petals. Snip the flowers just as they open and use them fresh or dried in your teas. The plant will continue to produce more flowers all season long. Lavender is treated in much the same way. You can use the leaves or flowers in teas or even baking, but the flowers are much more potent. Lavender is a little more finicky to start from seed. If you have a few extra bucks to spend on the plant, I recommend at least starting that way. They are rather slow-growing. We plant many different varieties of basil in our garden simply because I love walking through the scent. This year we experimented with lime, Thai and cinnamon basil teas. They are quite refreshing, and while I have not used them specifically for headaches, there are many herbalists who support their use in this way. The tea alone has a floral taste, but some of them present better coupled with other herbs.  This is a basic basil leaf tea written by herbalist Rosemary Gladstar that uses a combination of these herbs to soothe headaches and stress. Start by bringing the water to a boil, then pour it over the herb mixture. When I steep my teas, I like to keep them covered to trap all the goodness in the cup. The aroma and steam emitted from the brew contributes to the calming effect, in my opinion. When preparing the tea, use 1 teaspoon of dried herbs or 2 teaspoons of fresh herbs for each cup of water, and steep the blend for 15 minutes. For this recipe, you would use 1 teaspoon each of fresh basil and lemon balm, and add ¼ teaspoon lavender or chamomile. I prefer a bolder taste, so that ¼ teaspoon more wouldn’t make much of a difference. You might also consider premixing the dried herbs. Four tablespoons of basil leaves, 4 tablespoons of lemon balm and 1 tablespoon of chamomile or lavender flowers added to a mason jar and shaken well would be ready to go whenever you needed it.  Another quick recipe comes from Jodi Helmer’s Grow Your Own Tea Garden. This recipe is for a much larger quantity but follows the same idea. It calls for fresh herbs. If you only have dried herbs on hand, cut the amount in half. For this recipe, steep the tea for 3-5 minutes and strain. Chamomile tea is my normal stress reliever. I don’t know about you, but for me, stress brings on a headache real quick. Even if you don’t happen to have chamomile growing in your garden, you can pick an organic chamomile or chamomile-lavender tea blend from your local grocery store and add other herbs to it. If you can’t get used to the slight bitterness of the flowers, add a little lemon balm and you won’t be disappointed. 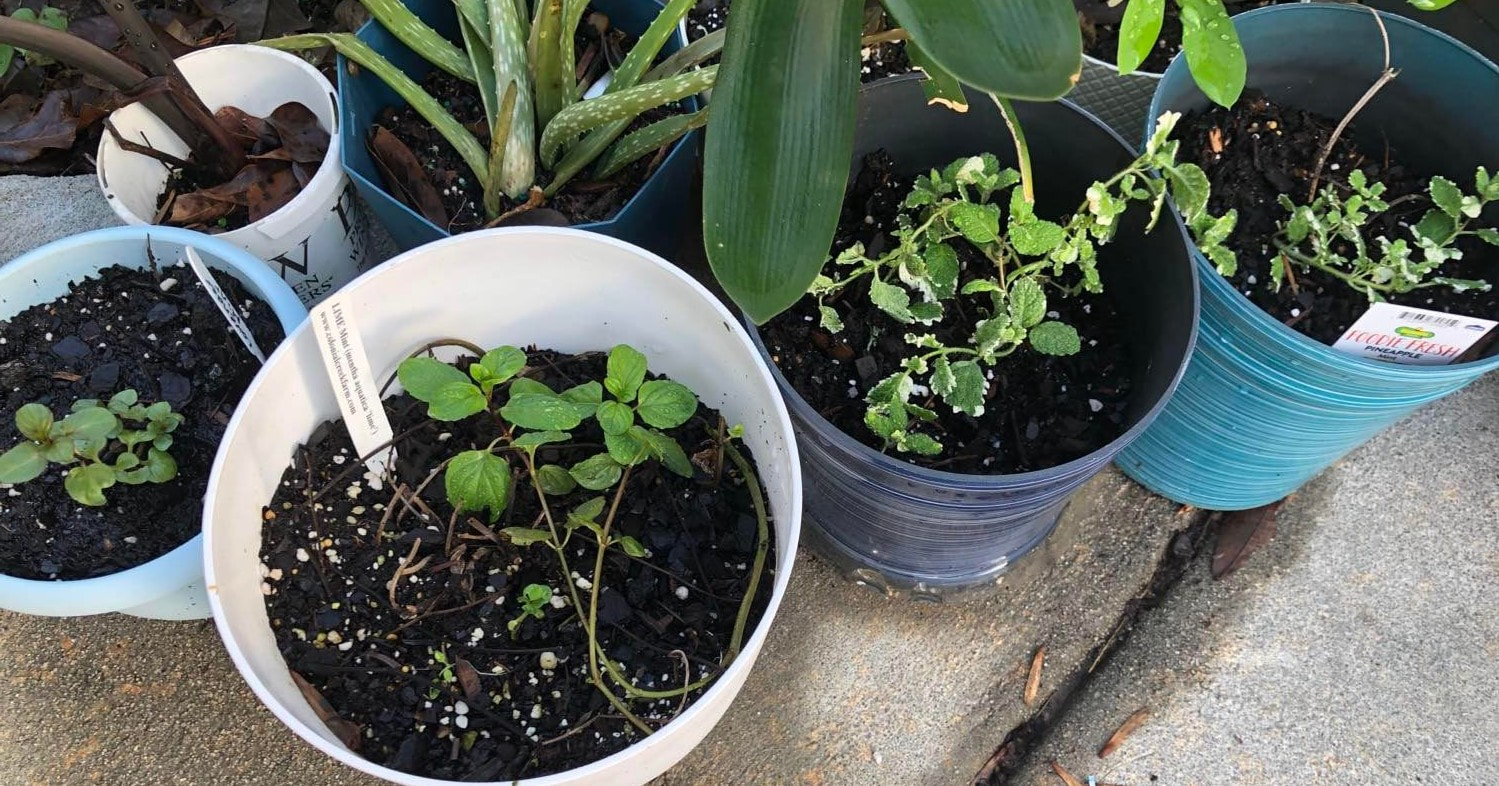 Some other herbs worth researching for headache relief are ginger, feverfew, catnip, sage, rosemary and lemon verbena. You can’t go wrong adding any of these to your tea garden, but you will want to look into whether or not any of them don’t play well together in your teas.
I’d love to hear about what you are sipping from your teacup. Check out a few of my summer concoctions on Facebook. For further research: Gladstar, R. (2008). Herbal Recipes for Vibrant Health: 175 Teas, Tonics, Oils, Salves, Tinctures and Other Natural Remedies for the Entire Family. Storey Publishing: North Adams, MA. Helmer, J. (2019). Growing Your Own Tea Garden: The Guide to Growing and Harvesting Flavorful Teas in Your Backyard. For Chapel Publishing: Mount Joy, PA Please note, I am not an herbalist or medical professional. The information contained in this blog are my opinions based upon my own research and are not intended to advise, prescribe, diagnose, remedy or treat anyone for illness or disease. 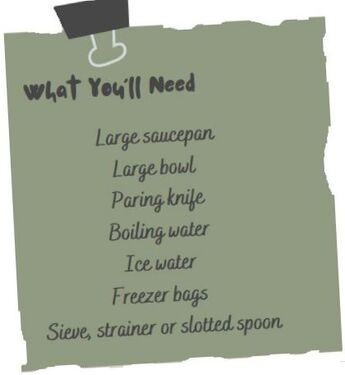 If you’re harvesting as many tomatoes as we are, you may also be struggling to put them into everyday meals right away. If you’re not into canning, or you just don’t have time, you can freeze those fresh tomatoes until you are able to dedicate a few hours to process them later. Freezing is one of the ways to preserve both the vibrant tomato colors and flavors. Before you get started, you will need to do a few things to prepare. First, fill a large saucepan with water and bring it to a boil over medium-high heat. The water does not need to be boiling when you begin working with the tomatoes; however, it should be scalding hot. While the water is heating up, you can wash the tomatoes and gather a large bowl. Once the hot water is ready, fill the bowl with ice and add cold water. Set the bowl near your work area beside the stove. 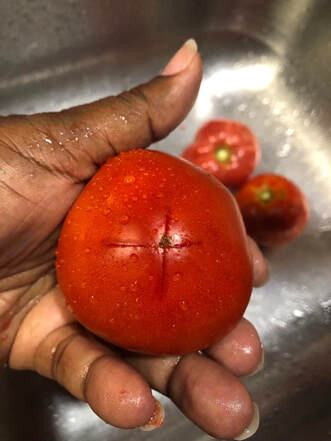 Step 1: Use a paring knife to gently score the bottom of the clean fruit. An X or + would create the best results, but even one shallow slit will be helpful. Be sure not to cut too deeply. You don’t want the tomato to cook through, nor do you want the seeds and juice to seep out during the process. 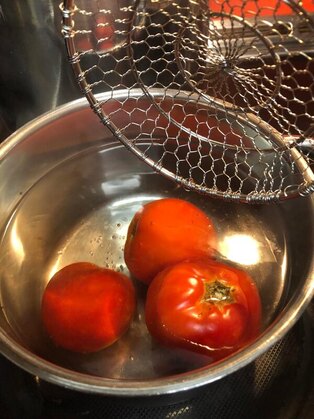 Step 2: Place a few tomatoes at a time into the scalding water and let them sit for 2-3 minutes. I like to use a sieve to lower the fruit into the water to avoid splashing. You do not want this water to scald you! If you don’t have a sieve, a slotted spoon will work just fine. After about 2 minutes, you will notice the edges of the skin around the slits begin to curl. They are ready! Remove the tomatoes from the water. 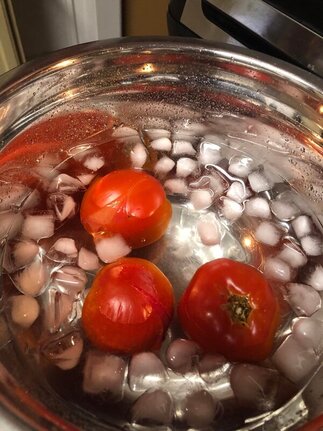 Step 3: Immediately place the tomatoes into the bowl of ice water. This will cool them down and prevent them from cooking. You may need to add more ice along the way or even change your water depending upon how many tomatoes you are peeling. The ice will melt and the water may become cloudy as juice seeps through the cracked and peeling skin. 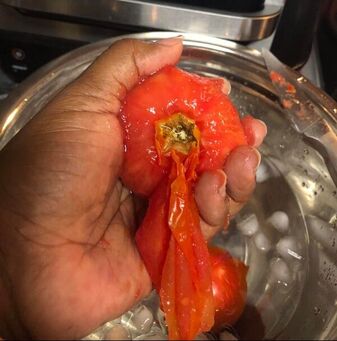 Step 4: Use the paring knife to slide the skin away from the tomatoes. It should come off easily. You will also need to remove the core of the tomato. Depending upon the variety, this may be a little difficult. Oddly shaped tomatoes or those with deep inward curves such as Cherokee Purple, Mushroom Basket or Costoluto Genovese will definitely be tricky. There are tools made just for this, but I prefer a knife. That’s how Grandma did it, and I didn’t have to pay for something else that will only have limited use in my kitchen. Once you remove the core, you are done!
It’s that simple! Now your tomatoes are ready for whatever your next step is. They can go directly into the freezer for later use. You can juice them, can them, make spaghetti sauce, salsa, ketchup or barbecue sauce. This week, I’m trying tomato preserves. I don’t know how it’s going to turn out, because this will be a first. I’d love to hear about your favorite tomato preserving methods. Happy gardening! It’s time for one of my favorite things to do in the garden- plant tomatoes. After experimenting with over 20 different varieties last year, I’ve decided to keep it simple and plant only a few this year. This is partly because I want to plant more leafy greens, but also because my first attempt to start seeds was a bust. They started out beautifully, but the cold weather week in March made it difficult to keep them growing as well as we normally do. So, I had to take a step back. Of course, we must grow our tried and true Better Boy as a hybrid. Lemon Boy was about the same, and hopefully, those seeds will take off in time for planting in May. In terms of heirlooms, we’re trying German Johnson and Chocolate Cherokee as trials this year. Kellogg’s Breakfast did fairly well in terms of taste, so we’ll have that along with Cherokee Purple and Brandywine. If we ever finish some of our home projects, there may be time to start another favored slicer that didn’t make it through early seed starting this winter. But either way, we will snip and save suckers as soon as the plants begin to take off. They will provide us with healthy plants to last through frost. And we don’t have to bother with seeds! Read about cloning tomatoes here. Cherry tomatoes will always hold a dear place in my heart. Picking them outside my grandmother’s door when I was growing up is the primary reason tomatoes became a favored fruit for me. If you want a prolific cherry tomato, you absolutely must grow Super Sweet 100. It sprawled all atop the chicken coop last year. We really couldn’t control it, and we gave tons of tomatoes away. So, we’ll definitely grow it again but in a place where we can better manage it. Sweet Million is a good one as well. Instead of Yellow Pear, which is also one you can just let go and watch it grow, we are trying Sun Gold. I’ve read in many of the tomato and gardening groups I frequent that this tomato is the number one cherry variety. I’ll be sure to post my review later in the summer. Now that we’ve established what we’re growing, let me tell you how we get our tomatoes to go wild and produce well. 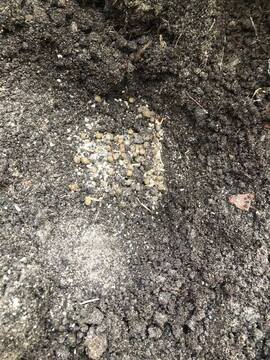 First, prepare the hole by determining the depth you want to plant the tomato. Check out two ways to determine this in step two. To prevent blossom end rot and begin feeding the plant immediately, we add a calcium-rich, organic fertilizer and rabbit manure to each hole. Follow the instructions for your fertilizer and sprinkle it generously into the hole. Depending upon the size of the plant, we add ¼ to 1 cup of dried rabbit pellets. Rabbit manure is perfectly safe for immediate use. It will not burn your plants like some other livestock manures and inorganic fertilizers. 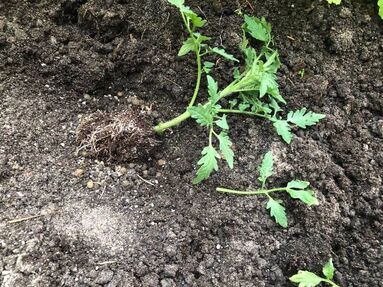 The hole is now ready for the plant. We like to plant our tomatoes so that most of the initial stalk is below ground. This will allow the tomato to grow additional roots all along that stem so the plant is sturdy and develops a healthy root system. You can achieve this by removing the leaves along the stem except for the top-most cluster. Then, bury the plant deeply beneath the soil. Another way to do this is to lie the plant flat along a trench. Then curve the top so the top cluster is upward. You may need to pack the soil tightly around that upper portion to prevent the plant from flopping back to the ground. You never want tomato leaves to have backsplash from the soil when watering them. It causes disease. 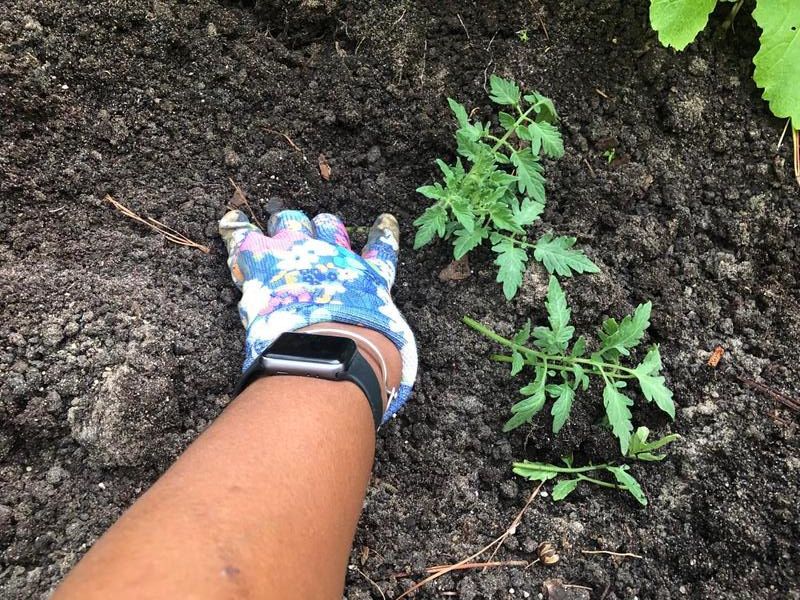 Don’t forget to water the plant well. We plant our veggie starts in the evening. This way, the plants have a few hours to soak up water and cozy up to their new growing space before this South Carolina heat begins to beat up on them. Other gardeners may plant early in the morning before the sun comes out. Do what works best for you. 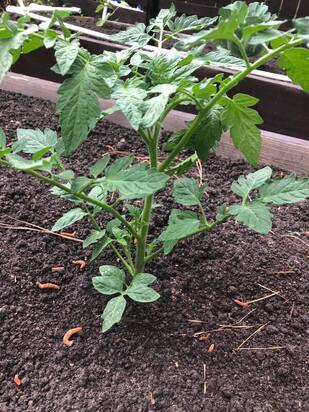
After just two weeks, these plants that were barely five inches above the soil, have stretched over a foot taller and are already at the bottom of the trellis. The lowest leaves will be trimmed to keep them away from the soil. We should be training them on the trellis next week. I’m sure your garden and family would benefit from the generous bounty of any fruit trees that will grow in your area. Some large fruit trees are rather finicky, high maintenance, or require special growing requirements, so you must be aware of your growing zone and soil make-up in order to experience success. In spite of these hurdles, there are still many berries and fruits that are fairly easy to grow no matter where you live, and you can purchase different varieties that will keep you picking from early spring until frost. Some berries are categorized as everbearing. This means they fruit all season as long as conditions are favorable. Depending upon your growing zone, you may be interested in early, mid or late season varieties. Gardeners with a short growing season would most benefit from earlier season varieties, while those with longer grower seasons, like the southeastern United States, could plant any combination of the three as well as everbearing to stretch production as long as possible. 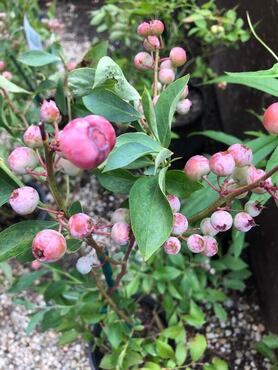 Blueberries Southern highbush and Northern highbush can both grow in the southeastern United States; however, rabbiteye varieties grow best. The southeastern states get pretty hot during the summer months. Rabbiteyes are most tolerant of the southern heat, and there are many native varieties that grow wild. Some of our favorite purchased varieties are Powder Blue and Climax. We’ve also grown Tifblue, Woodard, Pink Lemonade and Blue Belle. While most of these bushes will fruit without a pollinator, it is best to grow at least two compatible varieties to encourage larger berries. The chart below shows fruiting seasons to help you determine which varieties may best support your gardening needs. Maintenance: Blueberries prefer acidic soil with pH 4.3 to 5.50. To maintain that acidity, we use a fertilizer for rhododendrons and hydrangeas in early spring just as the buds begin to swell and mid-summer. Keep the bushes mulched well with an organic material such as wood chips, pine straw or leaves to keep the ground moist around the trees. Blueberries require a LOT of water, especially in the heat of summer and if you are growing them in pots. Speaking of pots, they grow well in containers for those who have limited space. However, you will need to work a little harder to maintain the proper growing conditions. 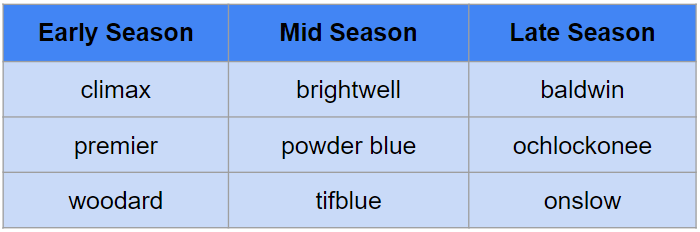 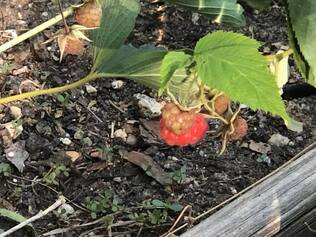 Raspberries Raspberries take at least a year to get established. They will then produce and multiply like crazy. I never thought we could grow raspberries in our southern heat; they are such a delicate fruit. However, we happened upon two thornless varieties that adapt well to our climate: Canby and Glencoe. We harvested Canby during the summer months, but most of them never made it indoors. Like many other small fruits and brambles, raspberries can be biennial, producing a summer crop on a second-year cane or everbearing. On everbearing plants, the first-year canes produce a fall crop, then they fruit in the spring on the second-year canes. The spent canes should be removed after fruiting to make way for new canes to emerge. This allows growers to harvest a spring crop and a fall crop in the same year. Fall Gold and Heritage are varieties that produce two crops over the year. Maintenance: Raspberries should be trellised to provide the best access to the fruit. Besides potentially dropping delicate fruits as you harvest them, you do not want your legs to brush against these sprawling barbed vines. It is not a great feeling, and we’ve been slowly replacing our thorny varieties with thornless for that very reason. Our smallest farmhand loves raspberries, and I would hate for those vines to snag her. Most varieties are fine to mix; however, if you grow a black raspberry, you should keep it about 100 feet away from the other raspberries as well as blackberries. If your plants are not everbearing, cut fruited canes to the ground once they are done. This will allow the plant to put its energy into producing healthy new canes for the next year. You may wish to cover the bed with fresh compost in the spring to encourage vigorous growth. Raspberries multiply by sending out runners underground. In just three years, our small, neglected raspberry patch grew from three plants to more than 15! So, if you find the right plant for your zone, you’re in for a treat and soon will have plenty to share. 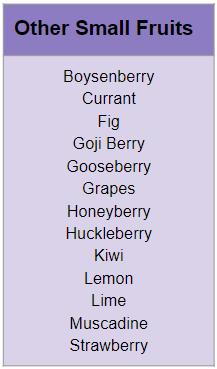 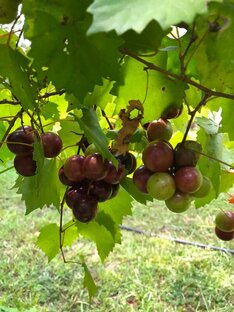 Blackberries Wild blackberries can be somewhat of a nuisance in your garden if you hadn’t planned for them. We are always pulling them up, even transplanting to other parts of the property where we don’t mind if they would continue their growth. Yet they die back each time. Although I have fond memories of getting up early with my family to go out and pick wild blackberries when I was younger, it is rare to find an undisturbed patch along roadsides now, and I don’t miss the scars from climbing over and through briars. Luckily ,there are many thornless varieties that can be grown right in your backyard. Some of our favorites are PrimeArk 45 and Ouchita. We also have Navajo and Arapaho that have been slow to establish themselves due to our own neglect, not the plant or variety. Maintenance: All of these blackberries are pleasant, but the benefit of PrimeArk is that it fruits on both 1st-year and 2nd-year canes. In terms of maintenance, the fruited canes should be removed at the end of the growing season to encourage new growth which will result in next year’s fruit. However, this is not true for PrimeArk. The current year’s fruited canes are left intact for a late spring harvest. Be careful to cover the vines if there is a late frost warning. It will damage the blooms resulting in the possibility of losing that first crop. If you are in a wooded area where wild blackberries are prolific, you want to ensure they are not growing close to cultivated varieties as they are said to contaminate them. We have not experienced this problem. There are many other berries and small fruits that can fill your backyard or garden with tasty treats to tickle your palate all year long. If you have a greenhouse, large garage or basement, you can even widen the range of what you grow by offering your plants winter protection. So, now it’s time to do a little research and begin to add the berries that you believe your family will love. ~Happy Gardening! The varieties listed are best suited for southern climates. Learn about small fruits you can grow in your climate or growing zone by accessing your local county extension. My go-to here in South Carolina is Clemson Extension. However, I occasionally look at content from bordering states, North Carolina Extension and University of Georgia Extension.
|
AuthorI'm a wife, mother, daughter, educator, writer and hobby farmer. Welcome to my world of simply living. Archives
December 2023
Categories
|

 RSS Feed
